Farm Fresh Produce-Thanks to the dedication of growers like Spruce Ridge Farm

Spruce Ridge Farm pepper seedlings April 16
Spruce Ridge Farm pepper seedlings April 16 2023

Garden fresh doesn’t have to mean plucked from your own backyard. When I first starting preserving the food of the seasons, almost all of my fruits and vegetables came from local farms or vegetable markets. At that time, I had a little garden, and it was just for everyday meals.

In fact, my husband and I laugh at a statement made by me in those early years. “This year I am really going to follow the market.” He thought- okay great she is going to learn more about financial investing, but what I meant was I would determine when all those lovely, juicy fruits and vegetables were at their peak and at market.


It was in those years that I had the pleasure of meeting some hard-working farmers and orchardists that taught me more than just when the veggies were at their peak. In keeping with our goal at Cansanity to share all the knowledge we have accumulated over our 30 years of garden and food life; we want to share with you a series of blogs called “A tour of Ontario farms” that will highlight some of our favourite farms that we have had the pleasure to visit and the people who run them.

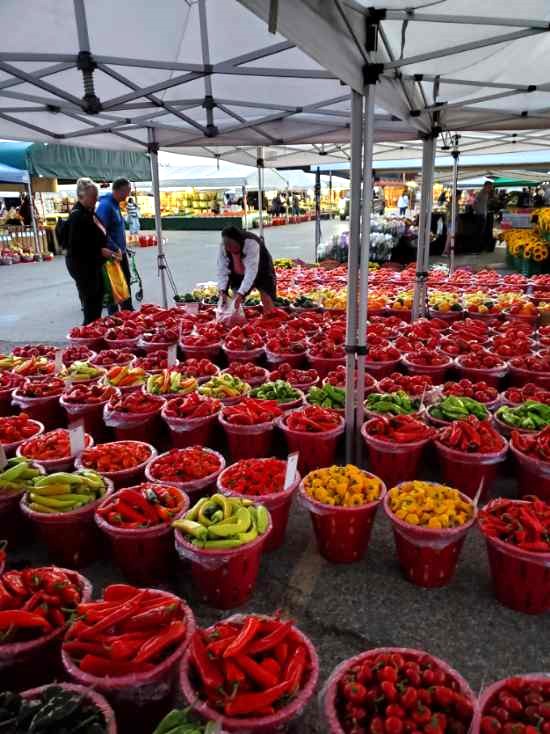
This blog will feature Elaine and Paul Lapadat of Spruce Ridge Farm found in Rodney, Ontario. We first met Elaine and Paul at St. Jacobs Farmers’ Market in St. Jacobs, Ontario more than a decade ago. You see, every year in late August or early September when tomatoes and peppers were at their peak, I would seek out their farm stand. It was my experience that they always had the very best vegetables, and their helpful staff in their bright orange shirts were always smiling and eager to sell us some of their gorgeous bushels of Roma and San Marzano tomatoes, as well as Poblano and ripe red bell peppers.

At that time of the year, those were my target vegetables to buy. My husband used to say I had the “goo-goo” eyes for them veggies. I was always so relieved and content to have my stash of those brightly coloured beauties packed into my car, homeward bound, and destined for Tomato Soup, Chunky Tomato Salsa and Pasta Sauce

Spruce Ridge Farm market veggies 2014
My haul of Spruce Ridge Farm market veggies 2014

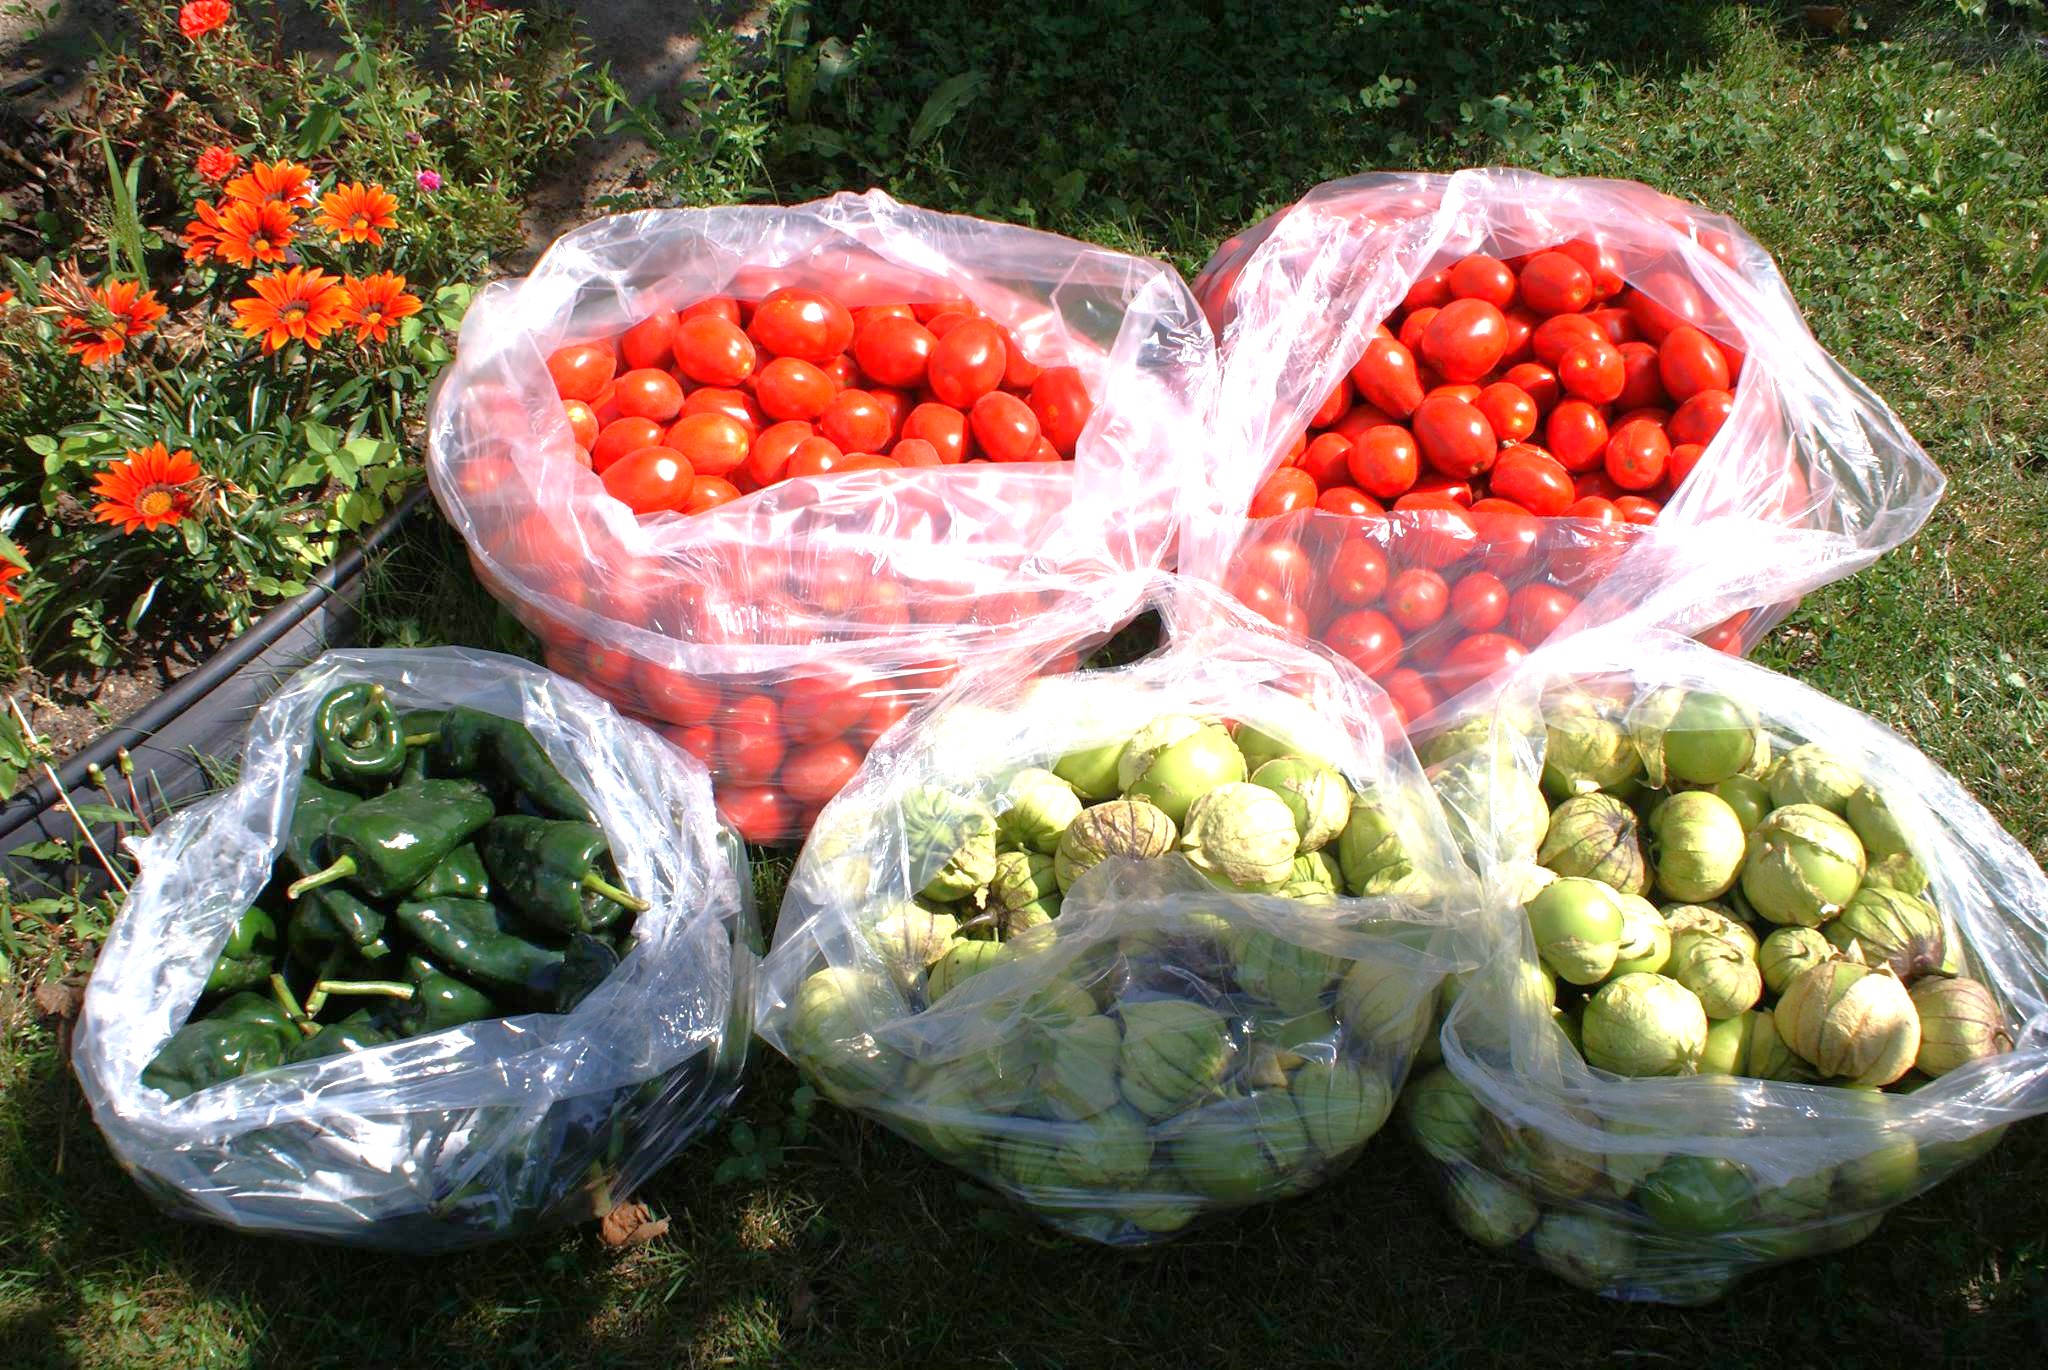
Over the years, I learnt that there were other great finds at the Spruce Ridge Farm stand at St. Jacobs market including: tomatillos, an amazing range of mild to hot peppers which included bell, jalapenos, habaneros, chili Cheyanne, crimson hots, Anaheim, ghost, reapers, cubanelles, shepherds, sweet and hot banana and Hungarian stuffing peppers. You can also find beautiful eggplants at their stand.

This April, we decided to visit Elaine and Paul at Spruce Ridge Farm, eager to learn more about their farm including the scale of their operations, seeding process and also the behind the scene look at what life is like on market days.


First, lets talk about the history of their farm. This 80-acre farm has been in the family since the 1940s with the first years growing tobacco and having most of the work done by horse drawn machinery.  In the 1970s, the family sold the tobacco quota and added a half acre of peppers and tomatoes to the corn and soybean production. In 1990, Paul, the third generation of the Lapadats took over the farm; he and Elaine added 3 acres of strawberries and up to 30 acres various market garden vegetables. At present, they are growing 10-acres of market garden vegetables and 1-acre strawberries focusing keen attention on only growing the finest tomatoes, peppers, eggplant and strawberries.

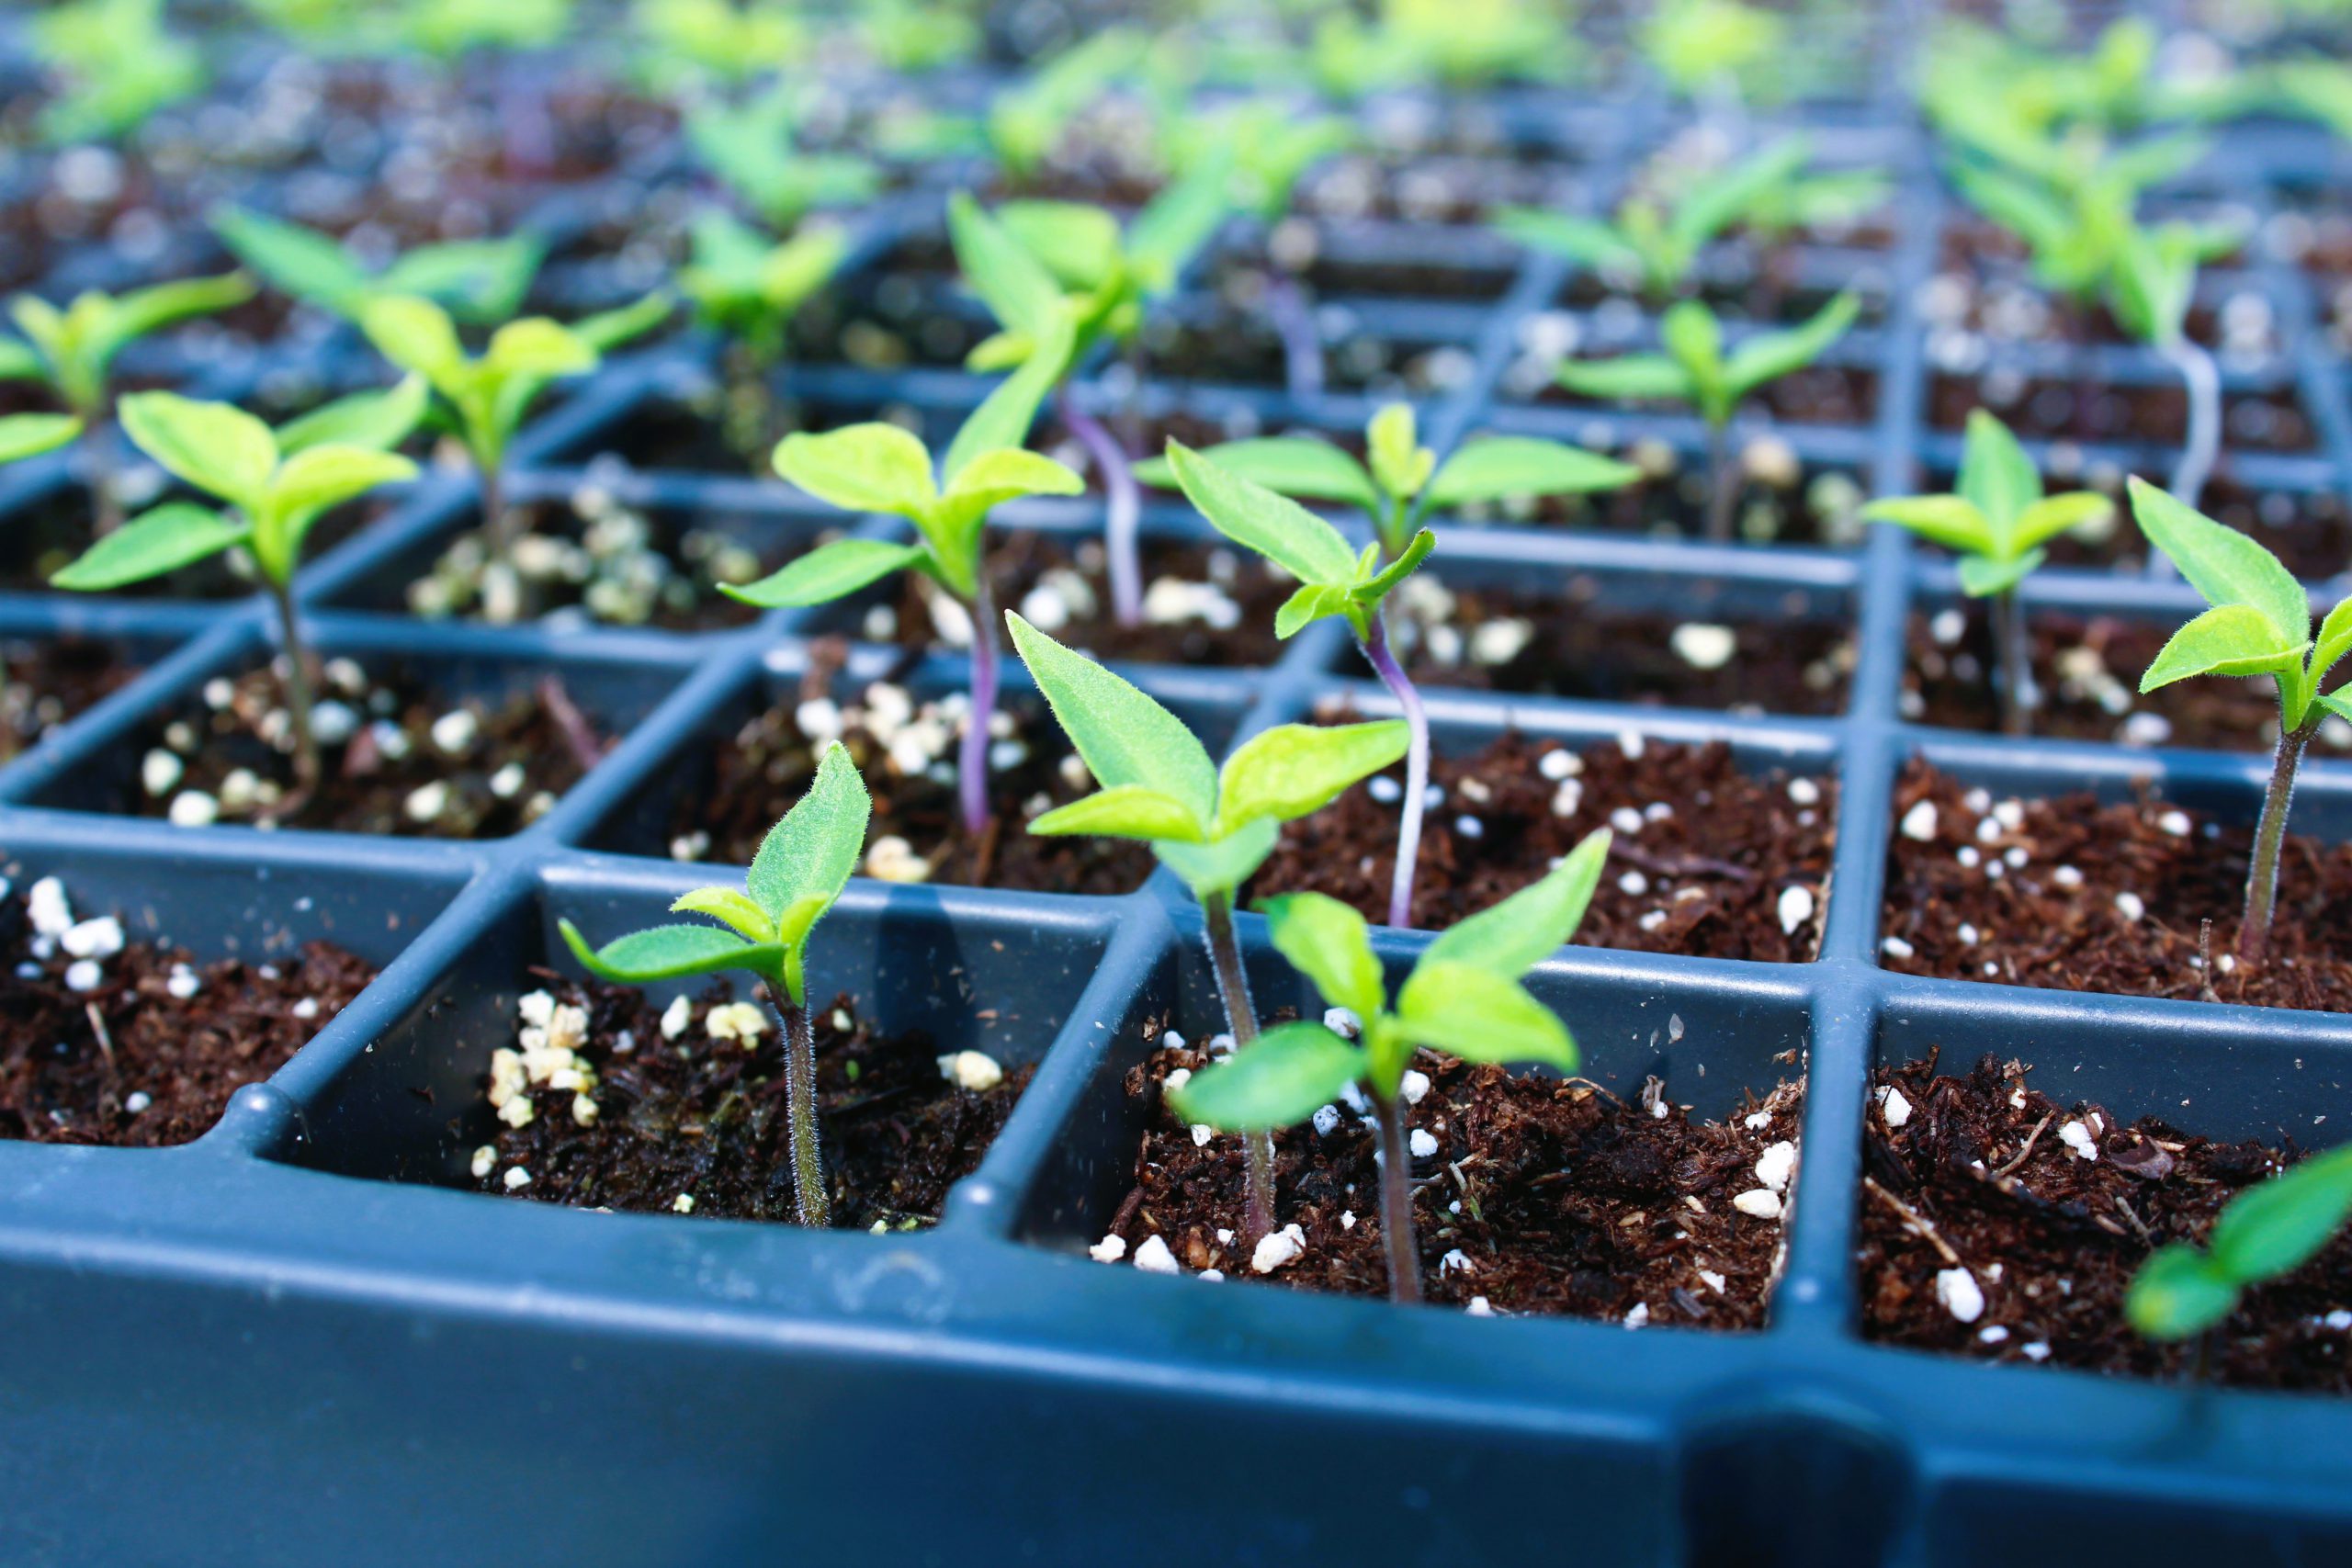
In February-April the Lapadats are busy seeding their plants. First with peppers and eggplants and then with tomatoes. The seeding is done using an automated seeder which has the capacity to allow for a seeding rate of 500 trays per day with each tray having 128 cells per tray.  That’s 64,000 plants! Typically though, they seed only 150 trays per day.

Automated Seeder at Spruce Ridge Farm

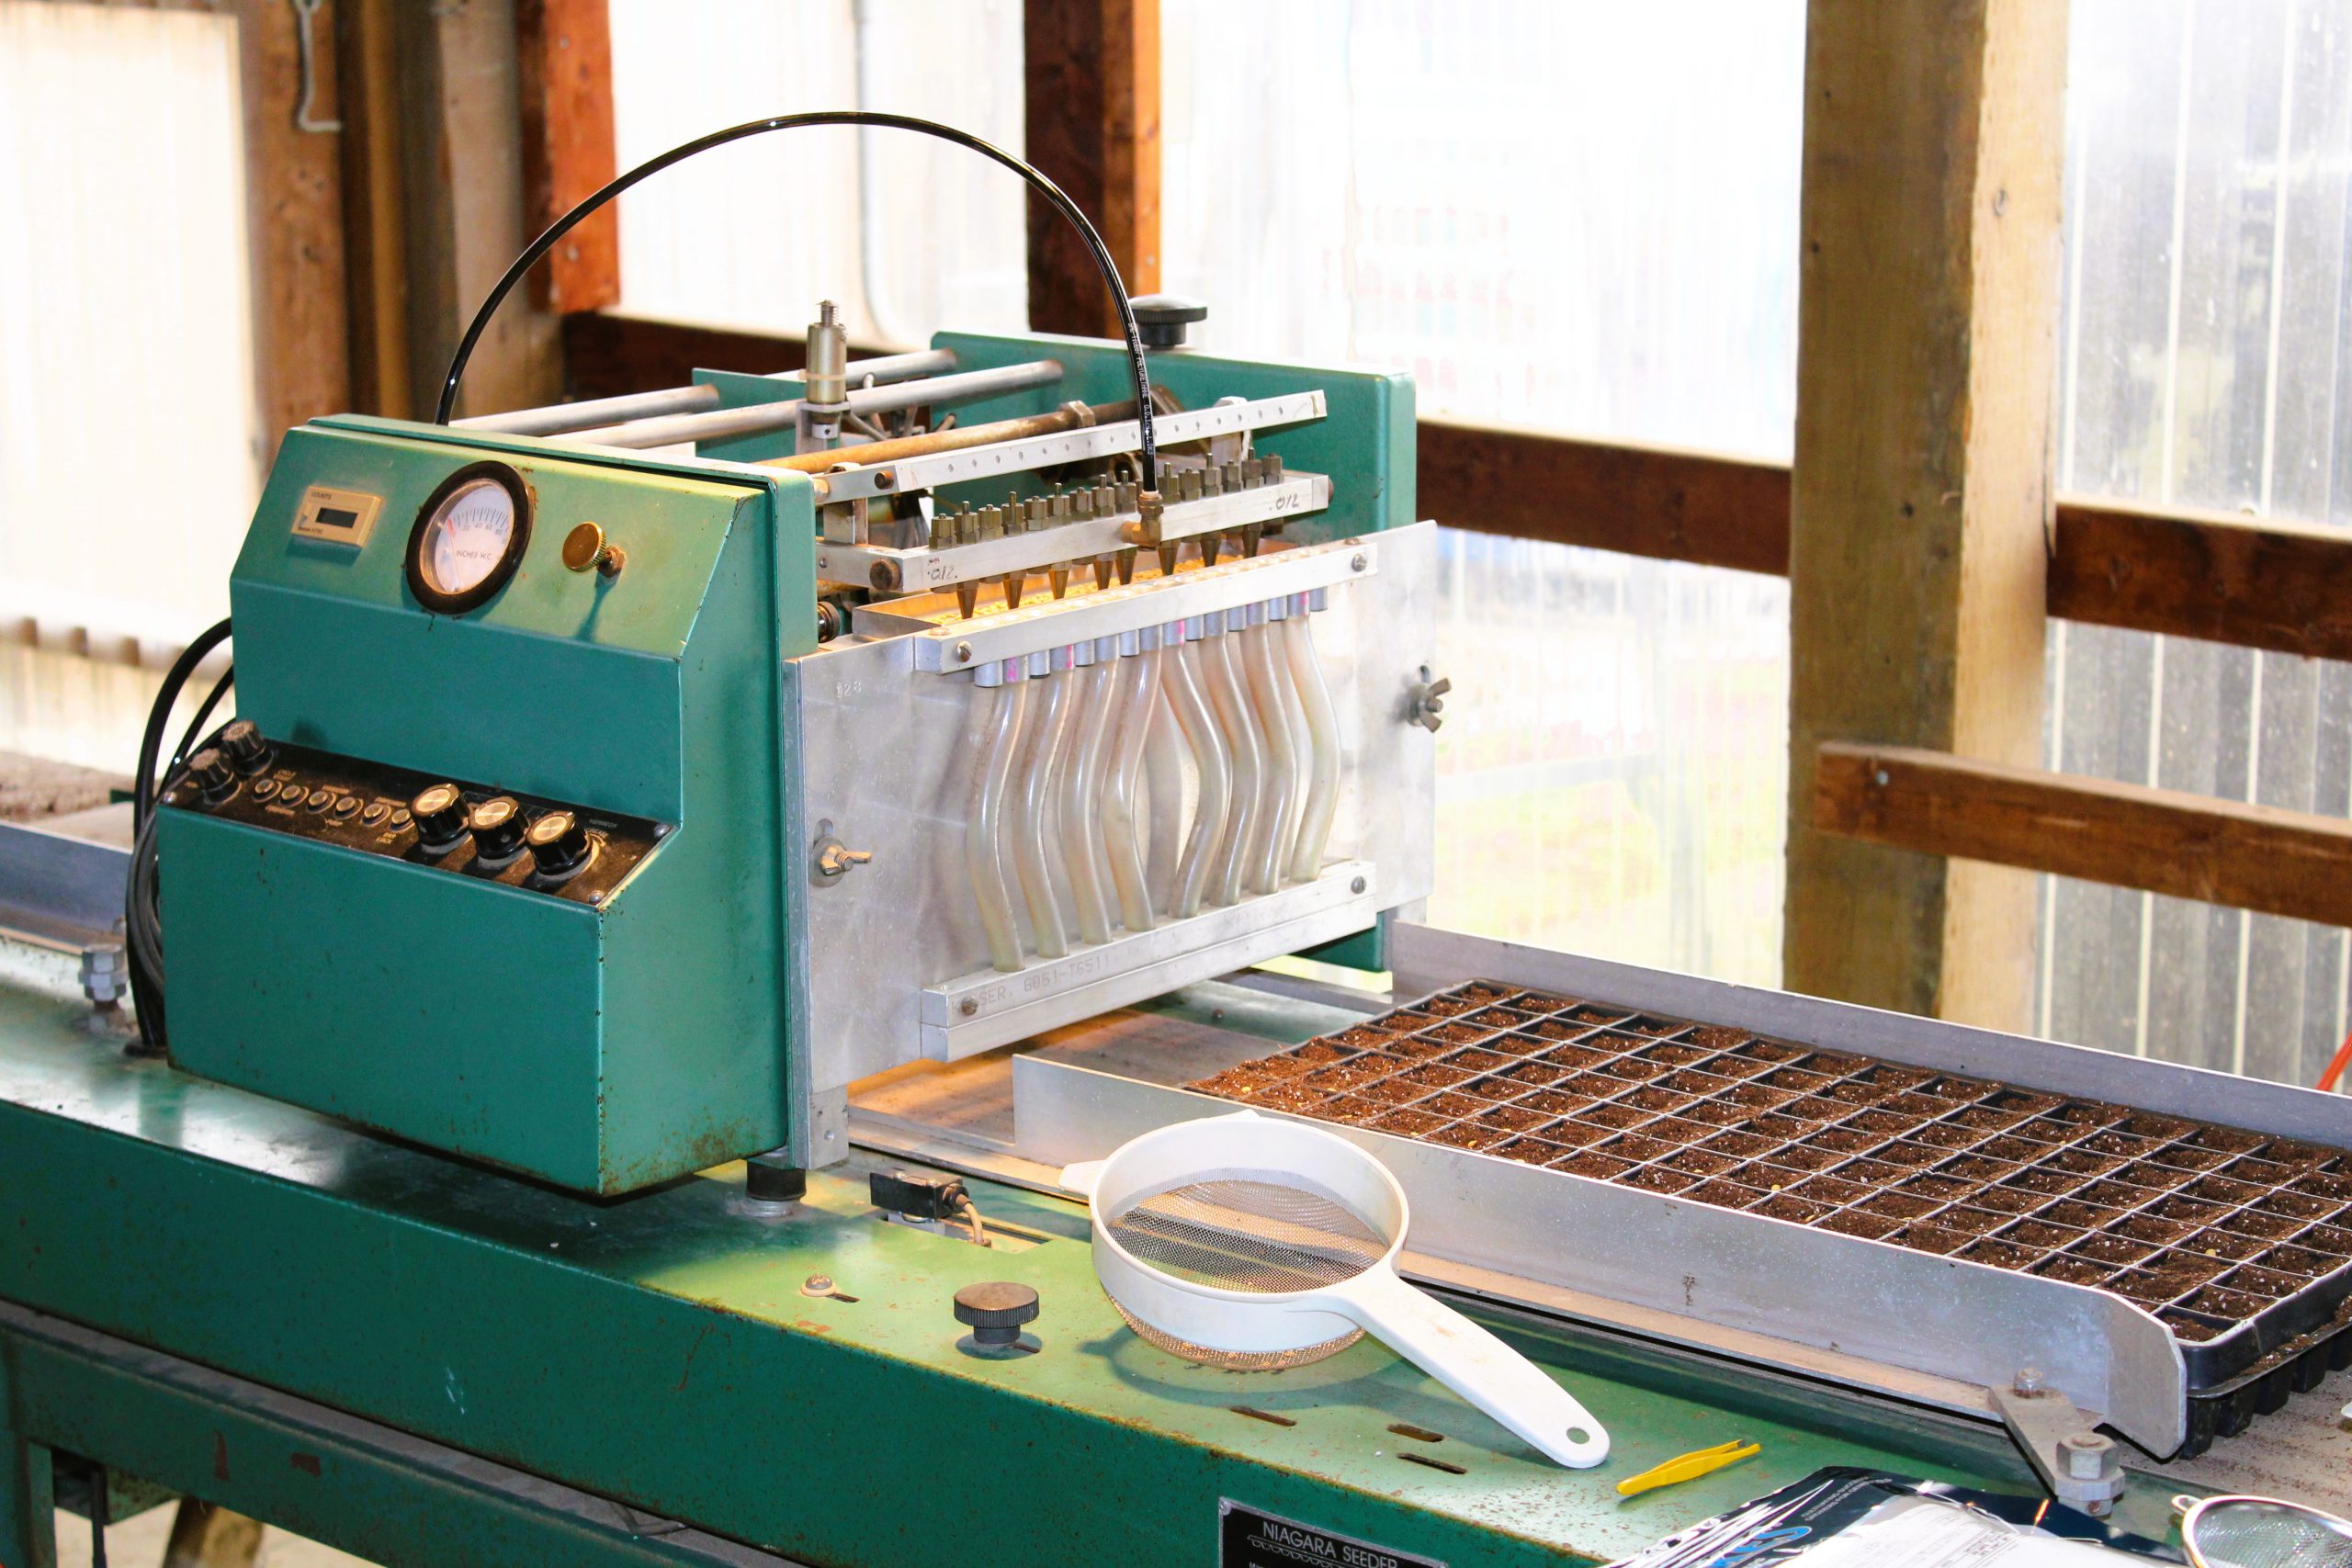
Once filled, the trays are watered, stacked, shrink wrapped, and moved to a 12’x 20′ germination chamber. Here the peppers will take 5, eggplant 4 and tomatoes 3 days to germinate. After germination, the pallets are disassembled, and the trays are moved to a 25’x 125′ green house.

Watering the newly seeded tomatoes
Pepper Seedlings at Spruce Ridge Farm

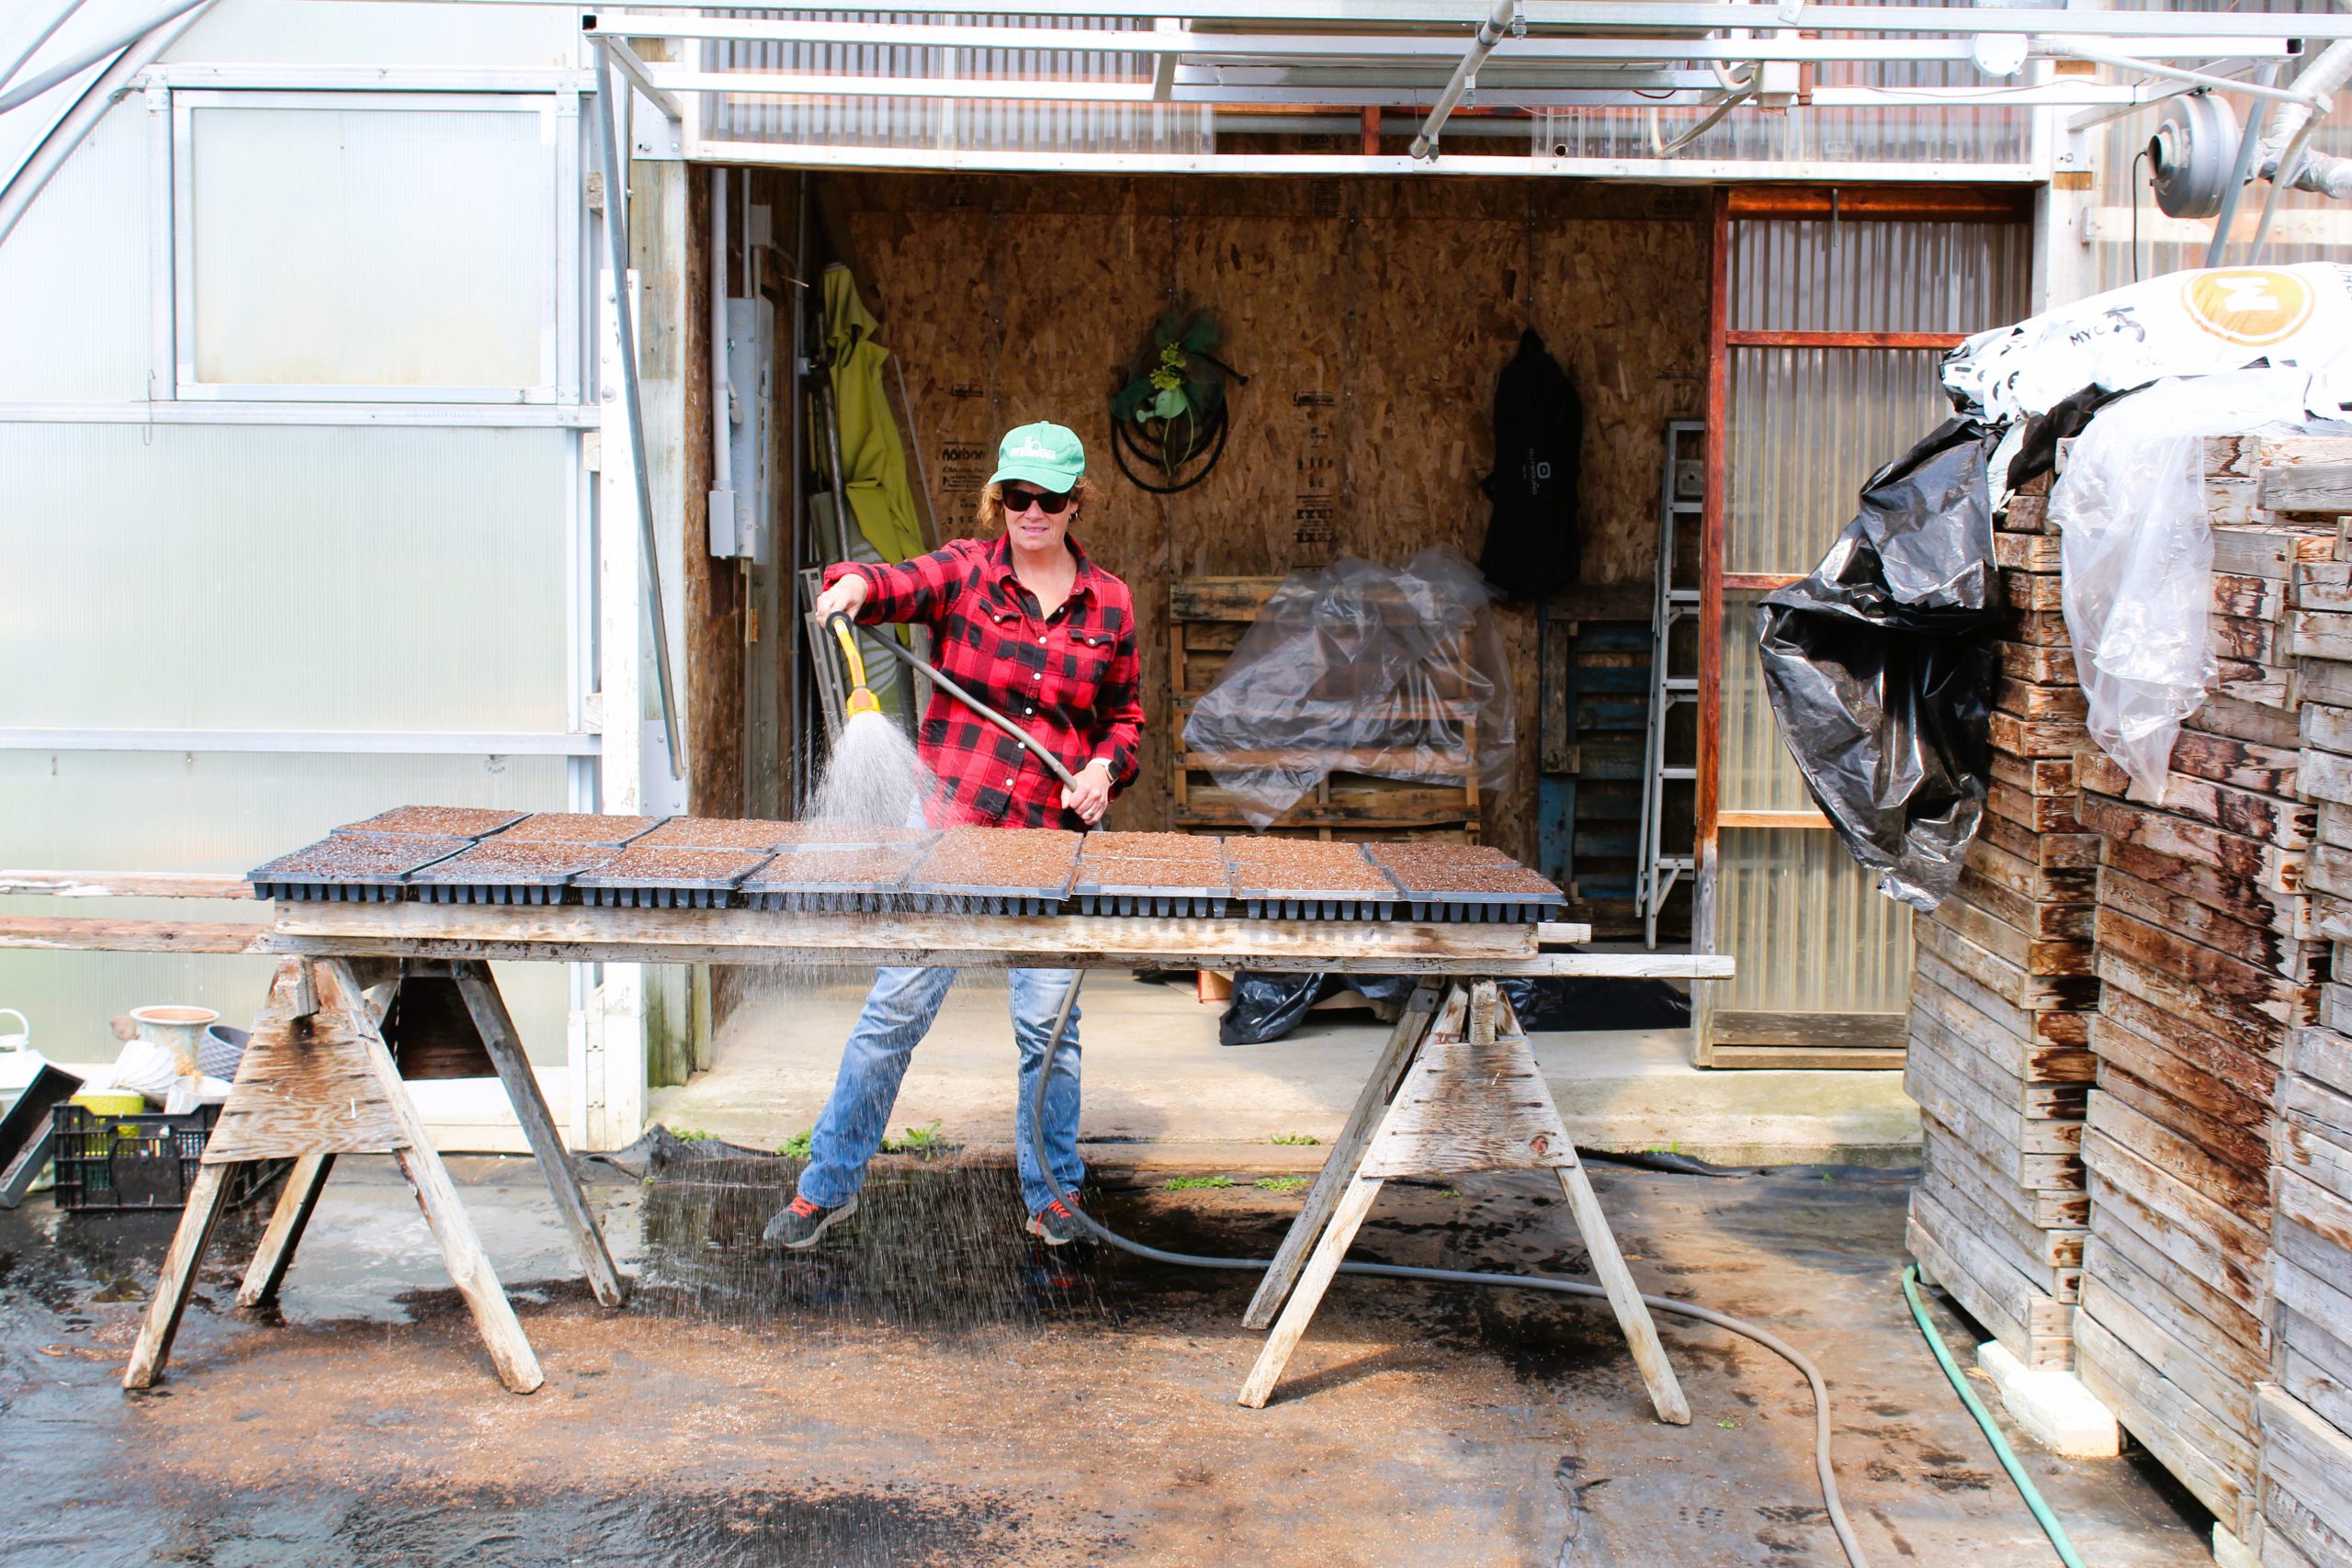
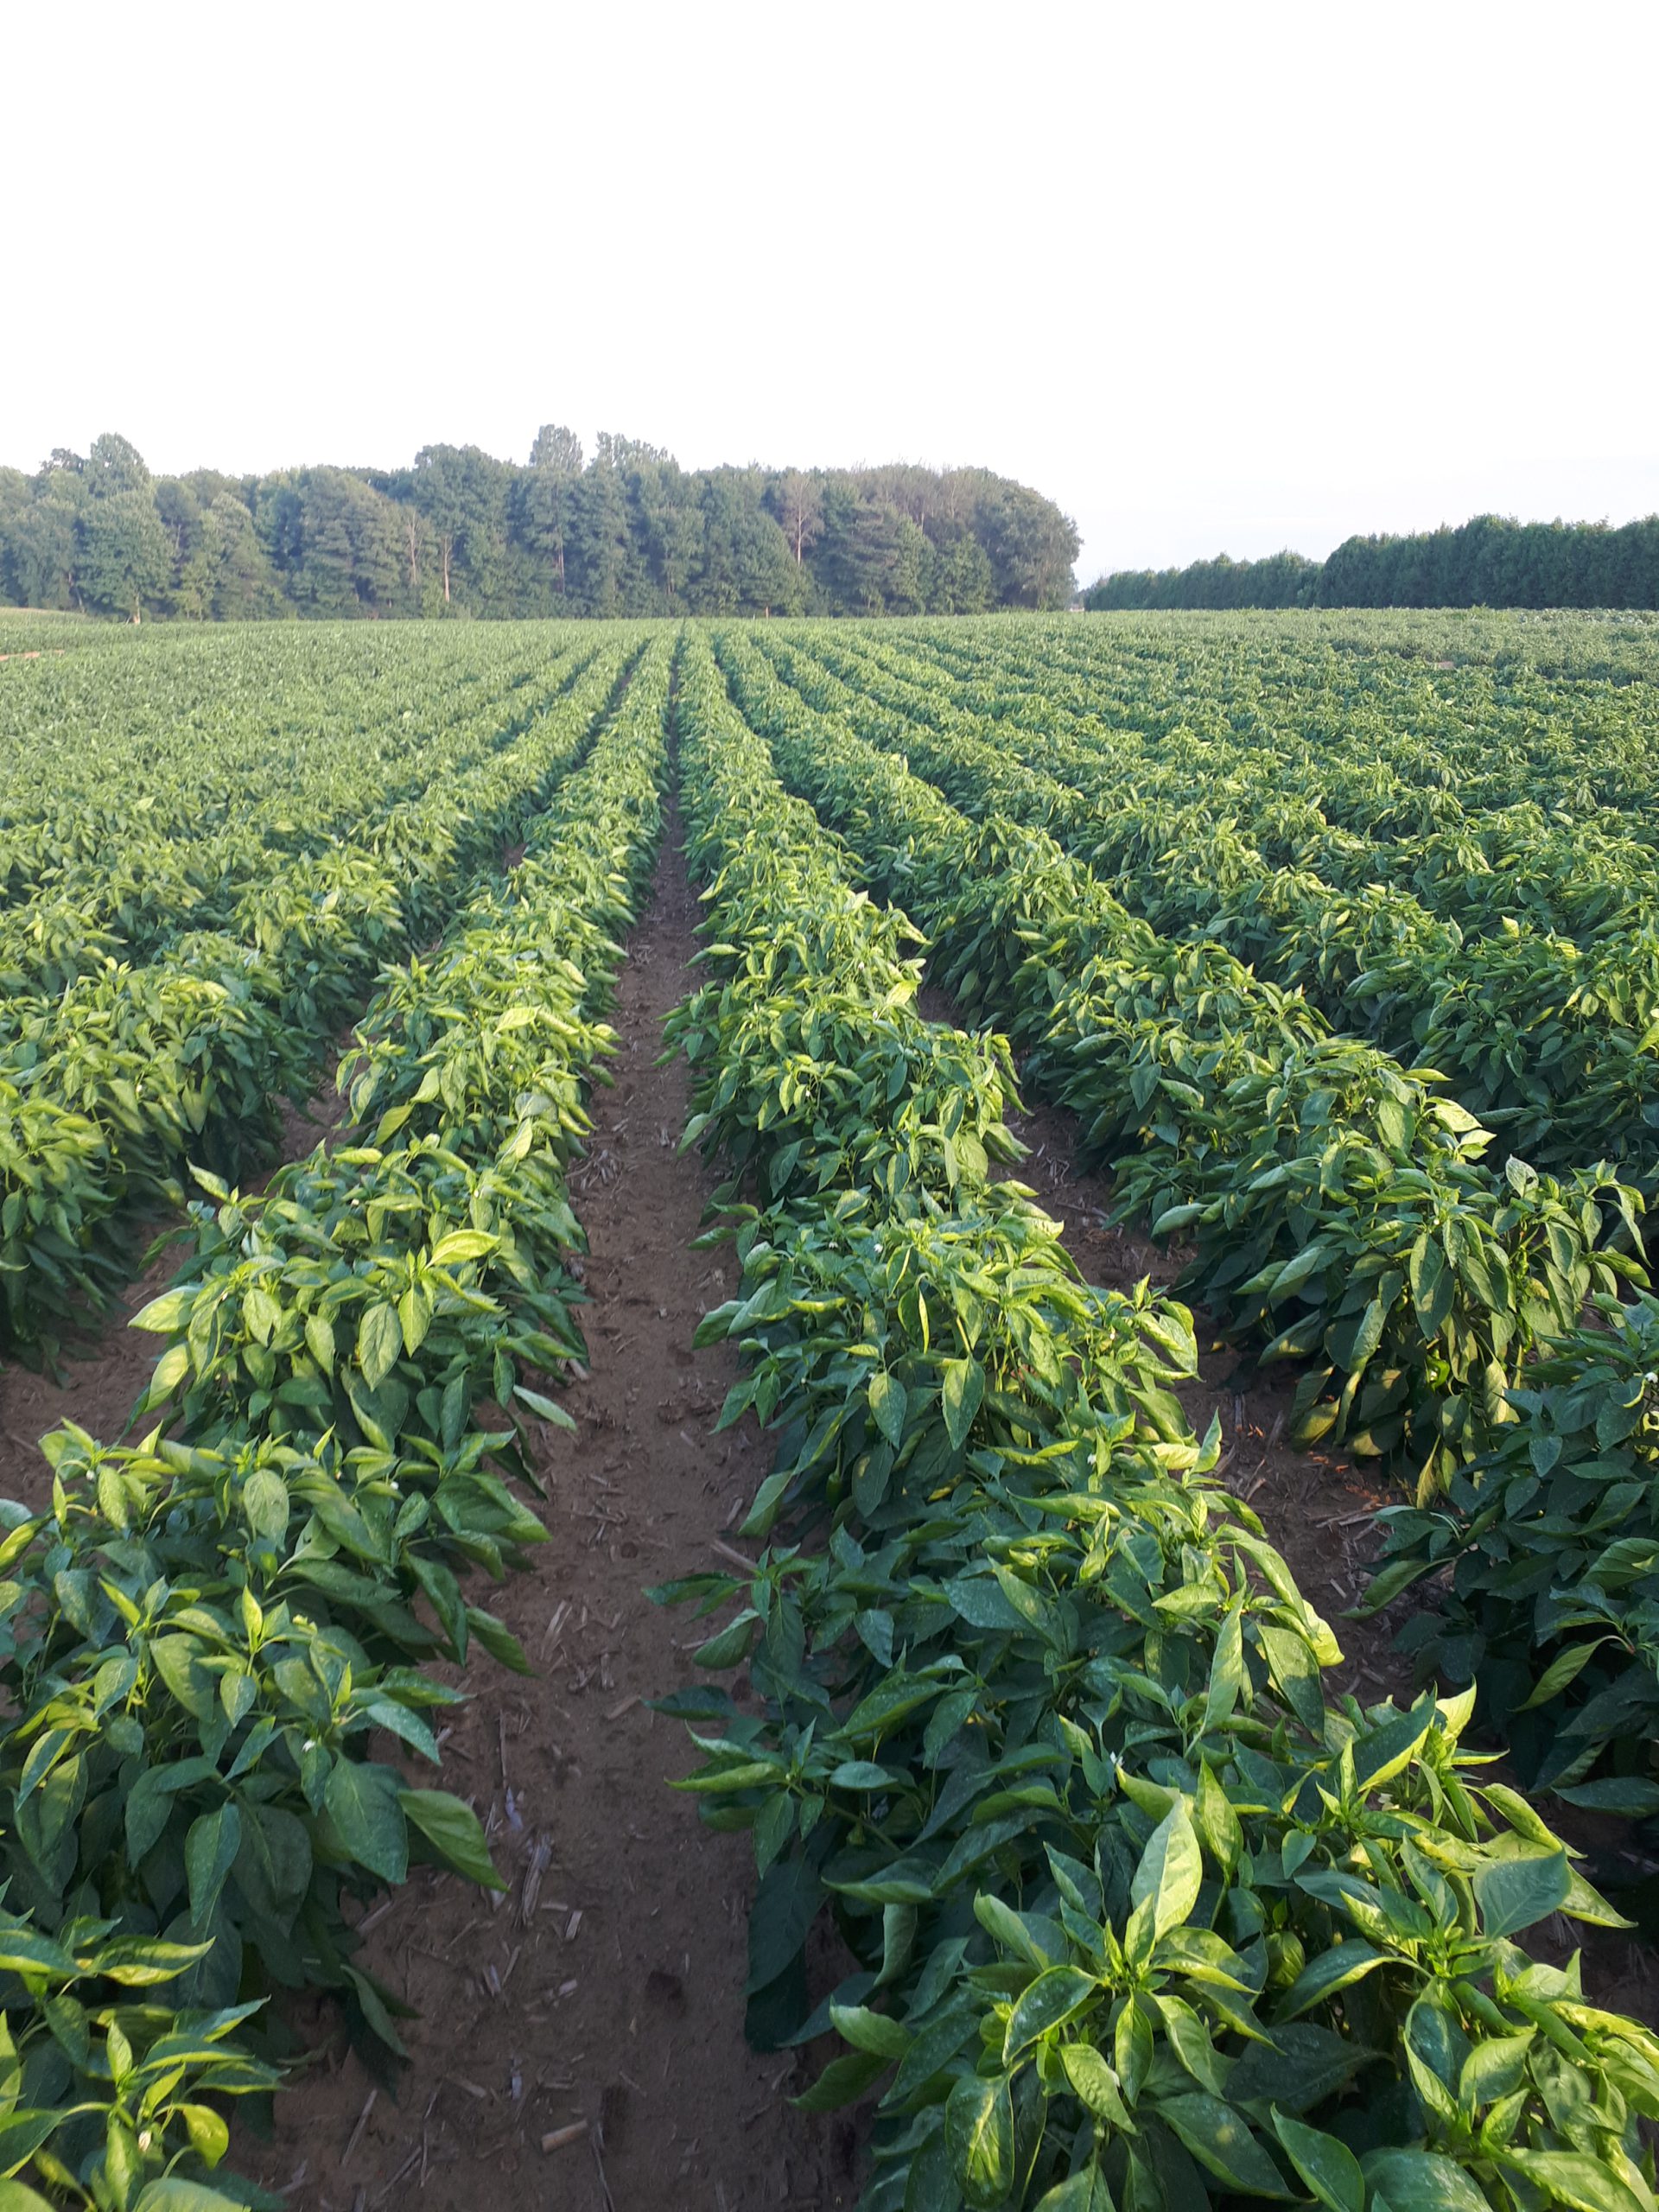
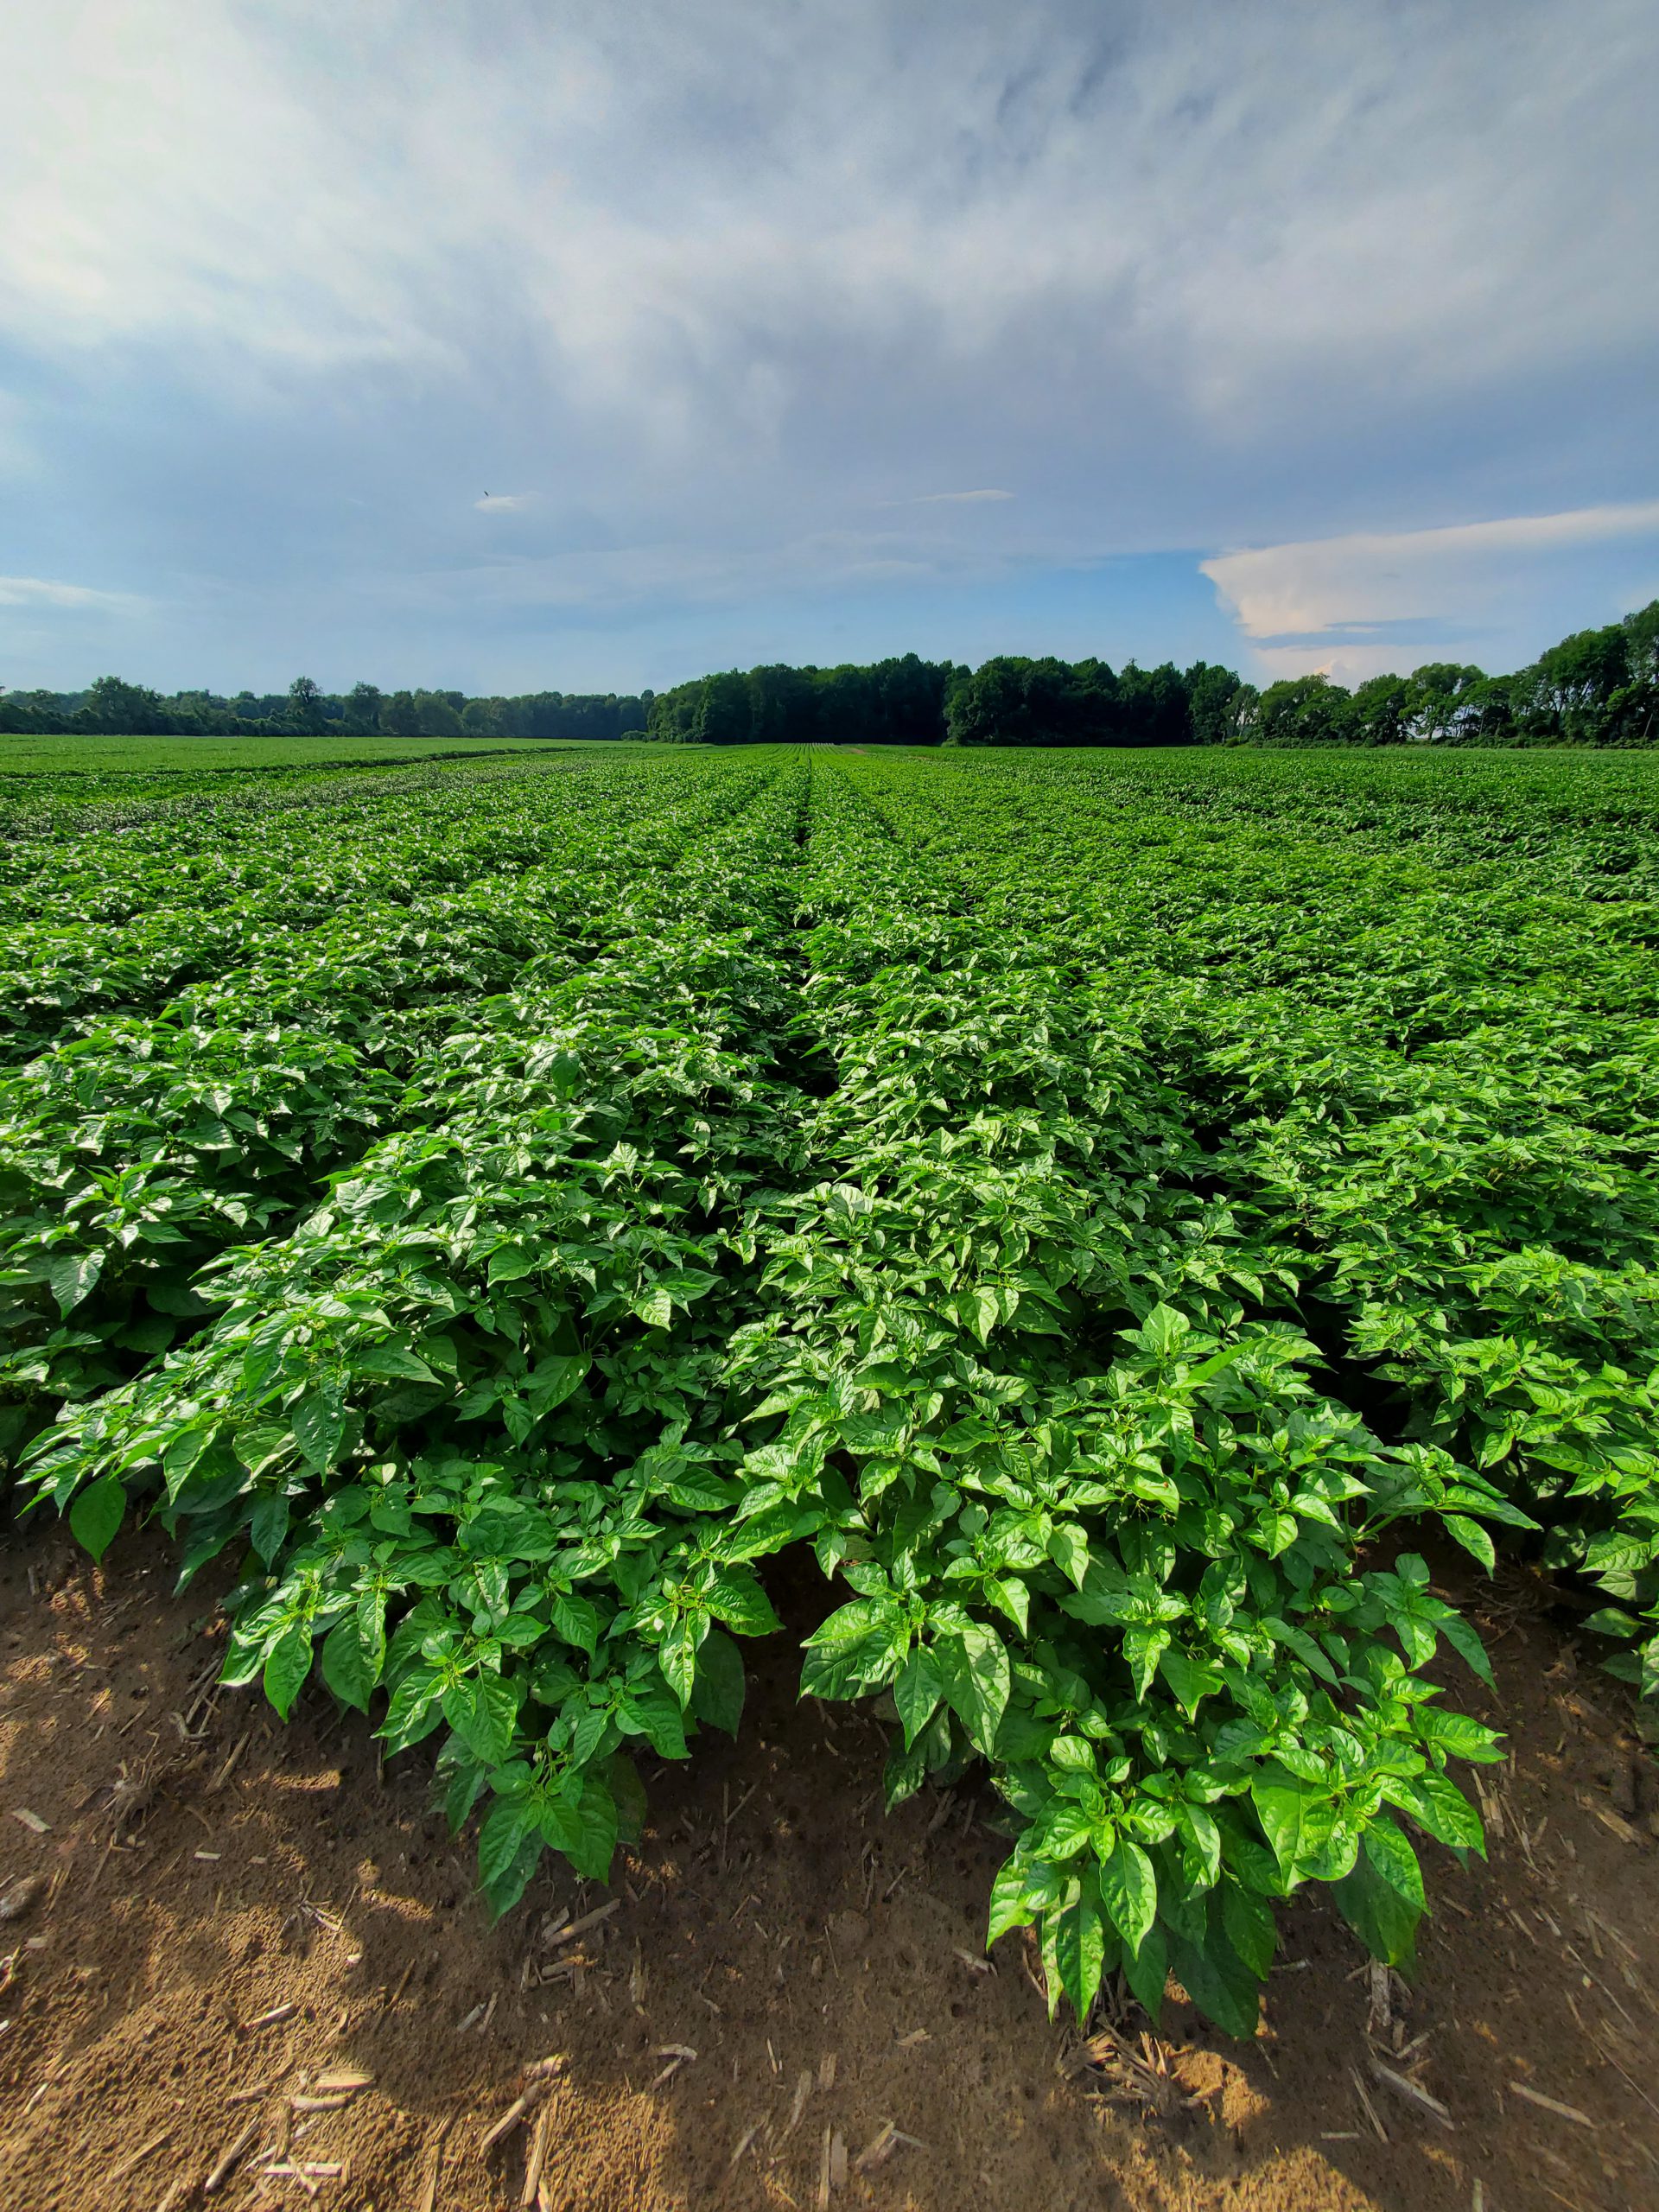
The greenhouse covered in 8-millimetre poly provides the perfect environment for their seedlings to develop. The temperature is controlled by automatic, electric fans that turn on as soon as the temperature of the greenhouse reaches 75°F.  Here the plants will grow for weeks until the May long weekend, and then they are planted using a customized planter. This planter can plant up to 8 acres a day!

Customized Seedling Planter

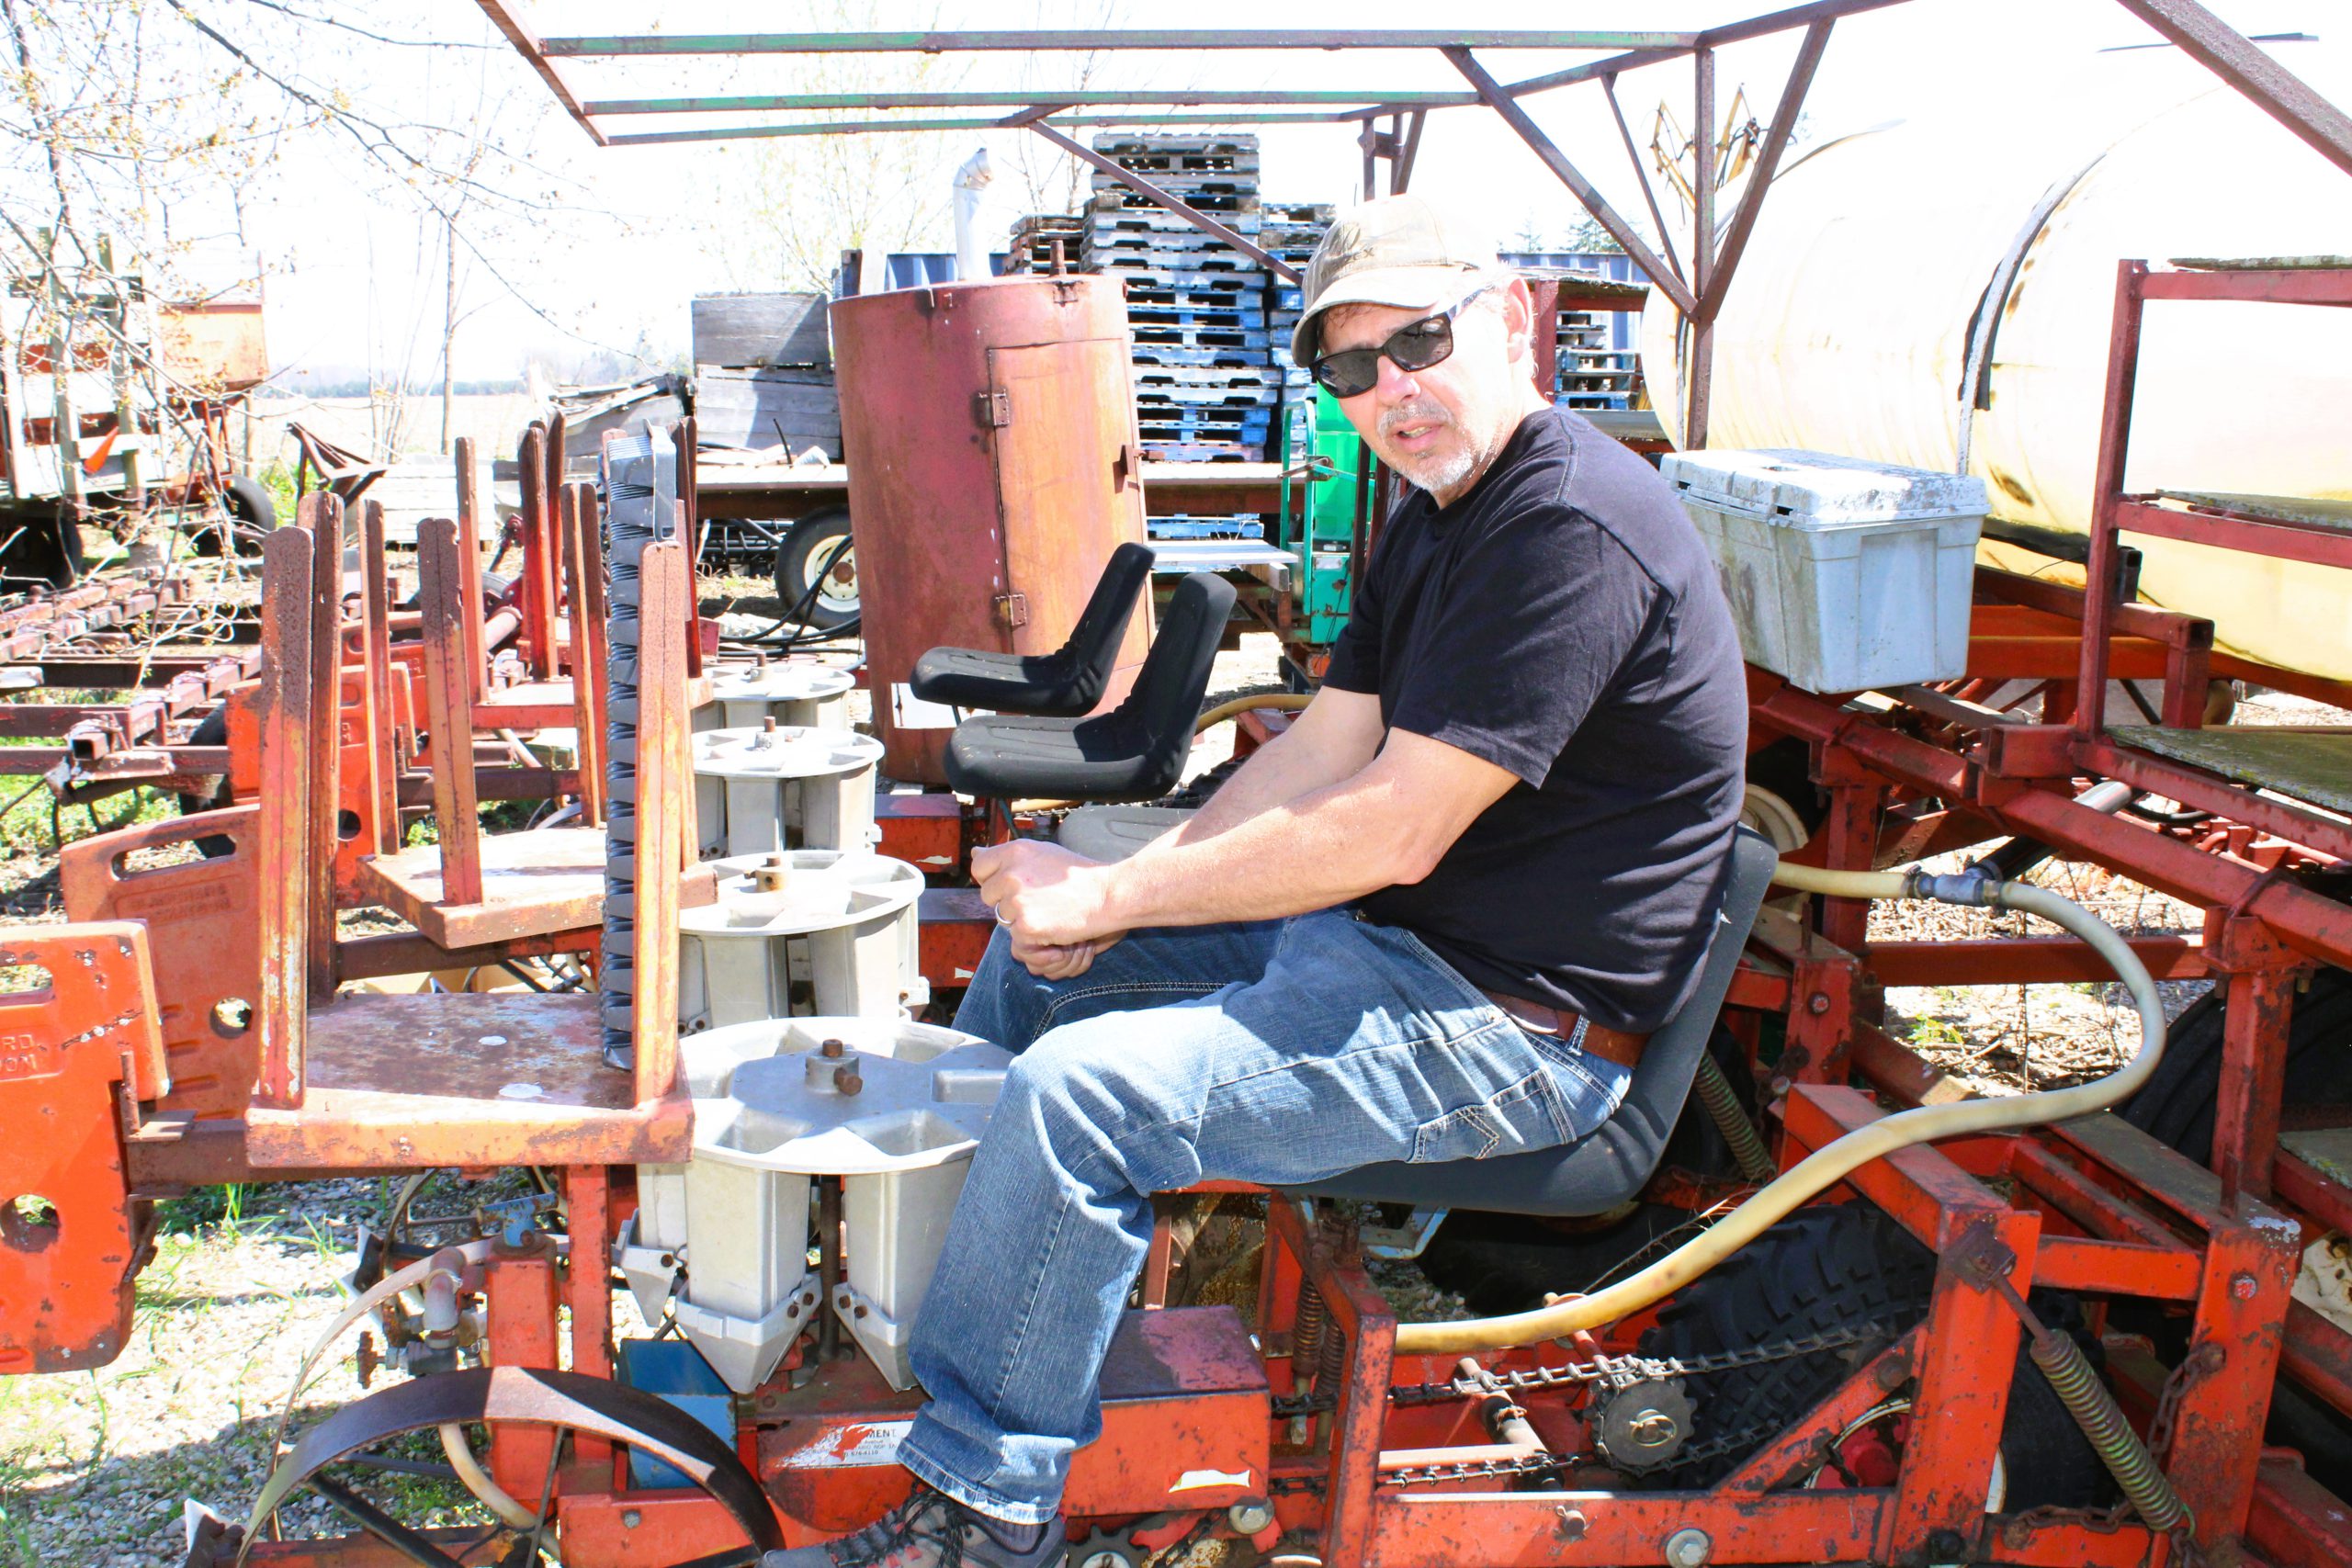
In the Rodney farming region, the soil composition is sand-based, making the land perfect for these crops because tomatoes and peppers both prefer a well drained soil. At the start of planting season, an application of a custom formulation of fertilizer is applied, the plants are planted, and then an application of nitrogen is applied in mid-July, once the fruit is on the plants.

Peppers at Spruce Ridge Farm pic 3

Spruce Ridge Farm peppers pic 4

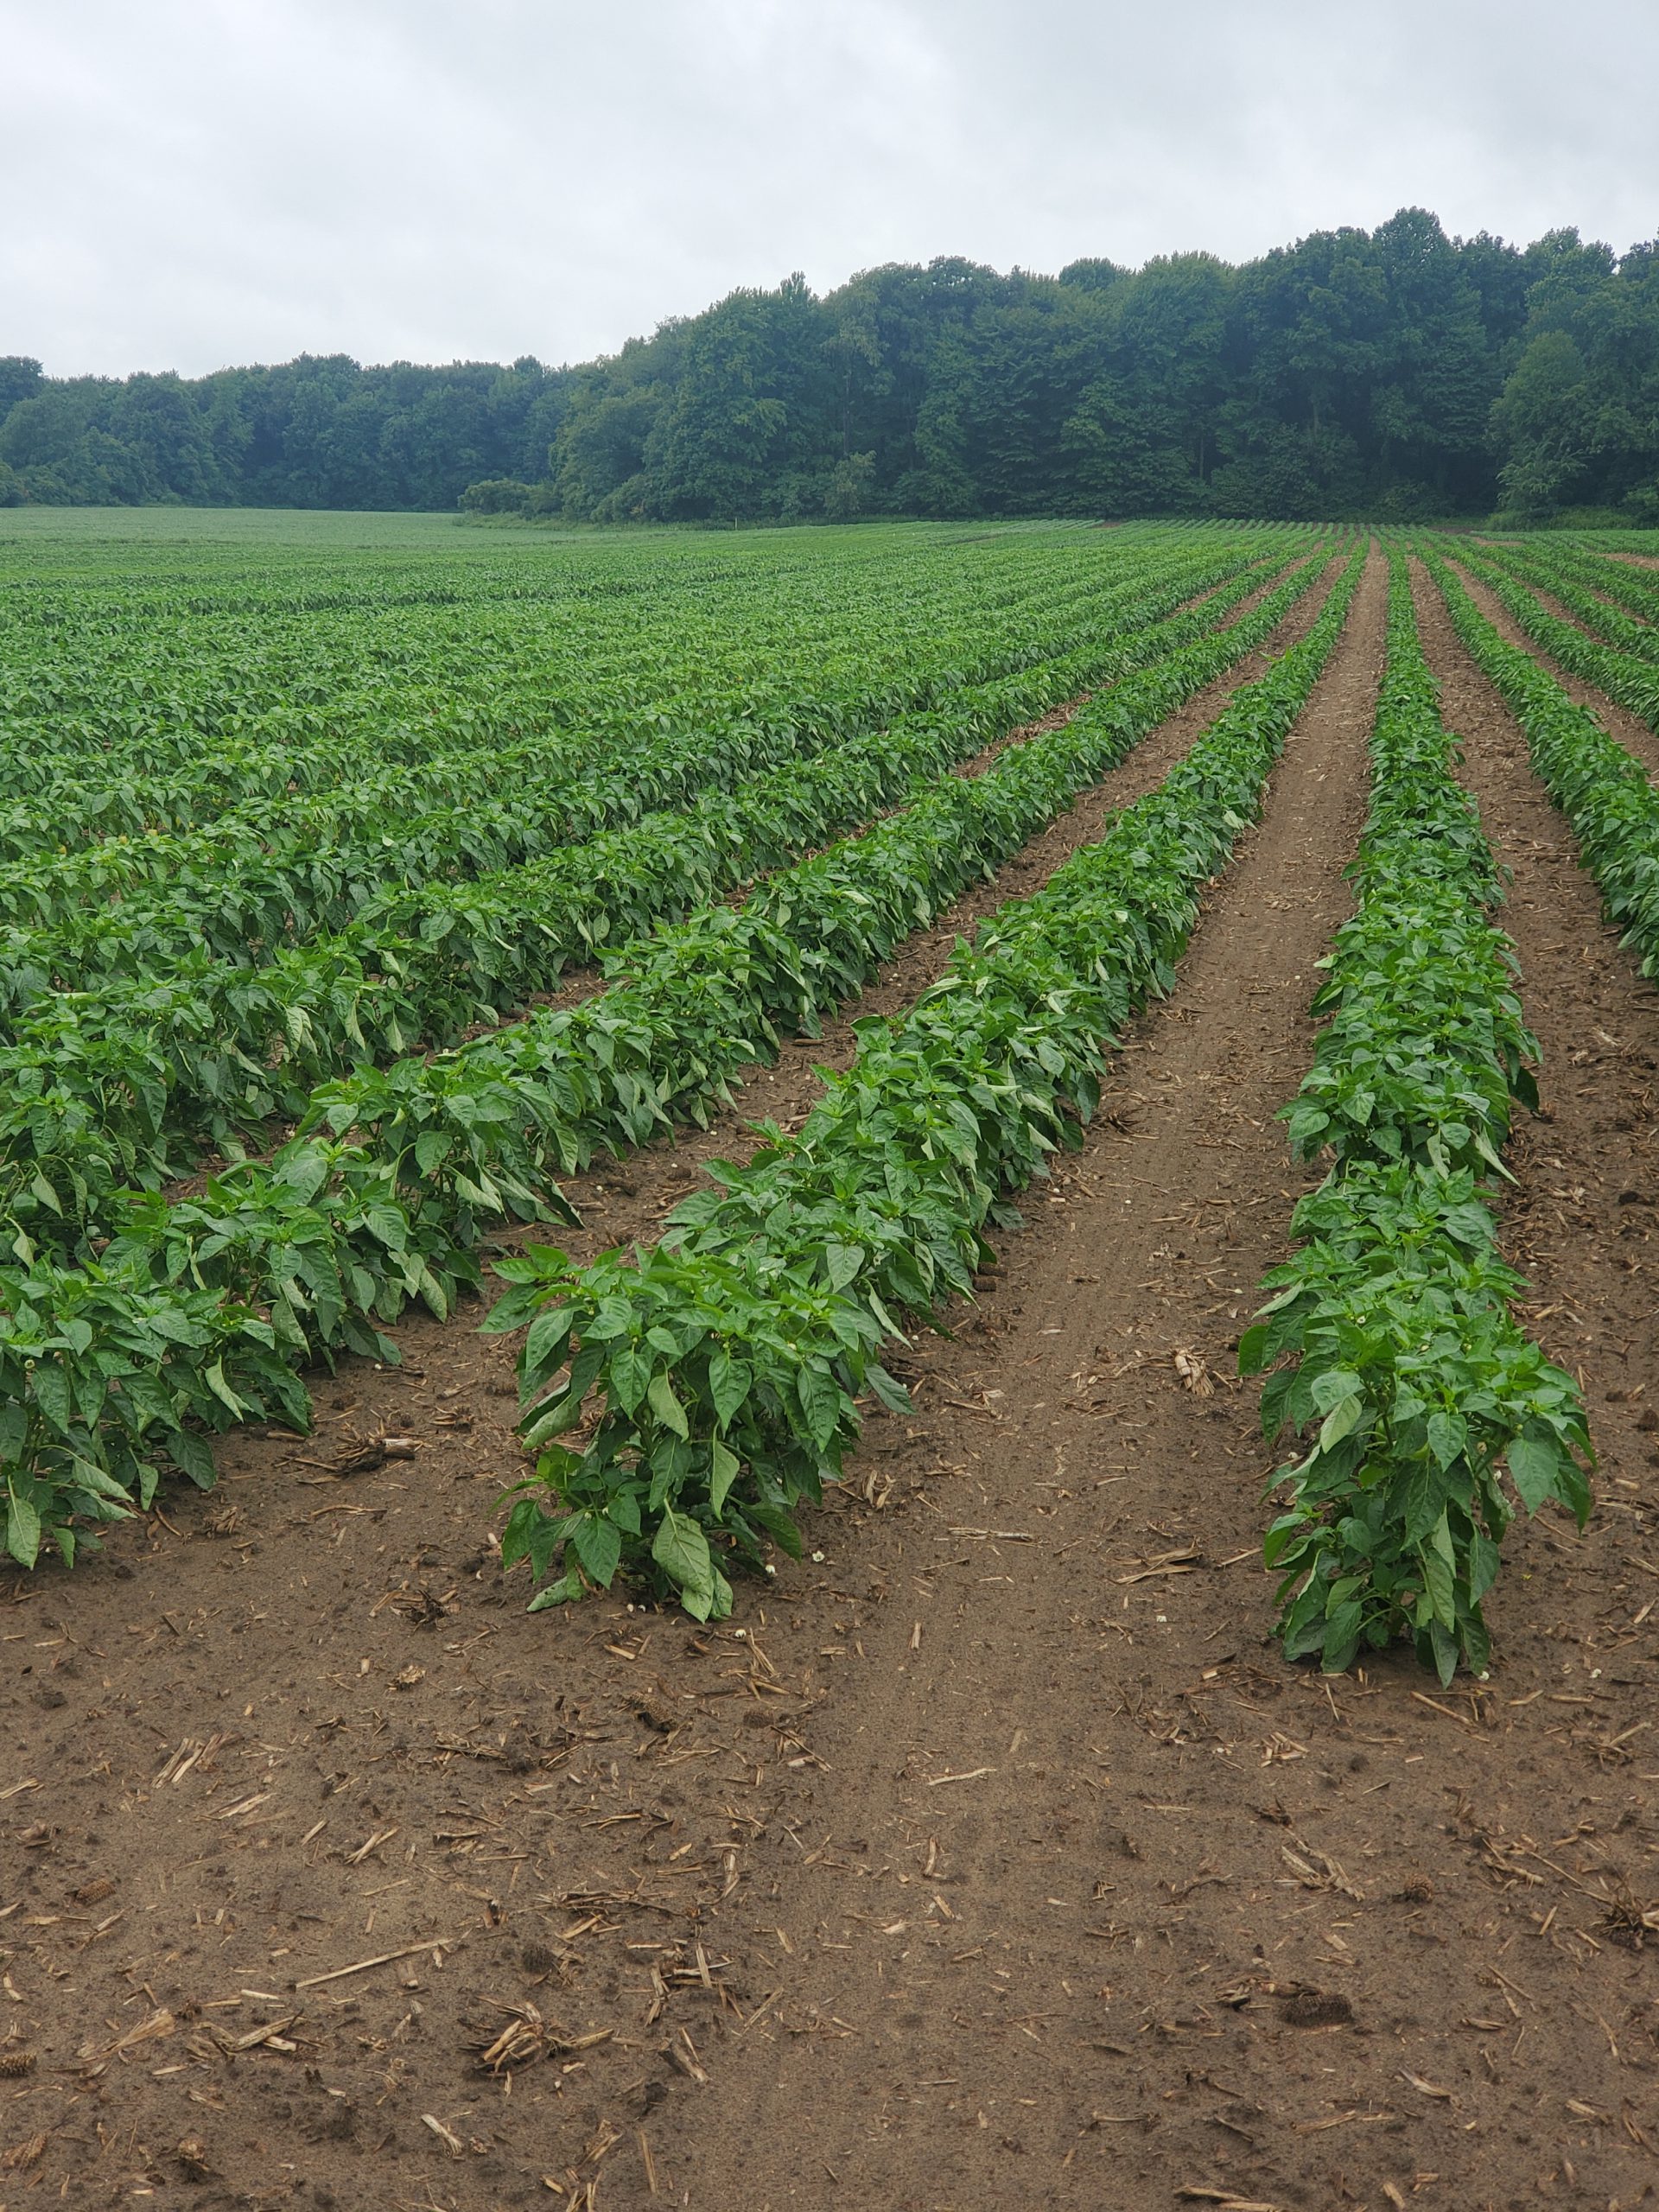
There are a number of pests that have to be kept in check including the European corn borer on peppers, stink bug on tomatoes, and the Colorado potato beetle. Interestingly enough, the Lapadats decided to plant eggplant along with the other nightshades – tomatoes and peppers – because the Colorado beetle is more attracted to the eggplant. So, if they get an infestation of the beetle, they are more likely to be concentrated on these plants, making it much easier to get rid of them.  Fungi, including blight and viral infection such as Rugose, are other problems that can infect the plants.

The harvest starts in August and is all done by hand! Spruce Ridge Farm employs 6 migrant workers from May 24 through October and every market day they employ 10-11 workers. An interesting, fun fact that all us market goers should appreciate is that the Lapadats and some of their staff get up at 1:00 a.m. to load up their two 26′ trucks and head to the market. They arrive at St. Jacobs at 3:30 a.m., and by the time they get set up, the sun is rising! Market opens at 7:00 a.m.  Such an amazing dedication of getting fresh farm to table vegetables for us!


Besides growing their market vegetables, the Lapadats also grow strawberries for sale at their farm stand in Rodney, Ontario, and they also have expanded into custom growing of peppers for companies that specialize in making hot sauce. One of the hottest peppers grown at Spruce Ridge Farms is Dragon’s Breath which is 2.48 million Scoville units on the Scoville scale which is  310 times hotter than a Jalapeno at 8,000 scoville units or 7 times hotter than a Habanero at 350,000 Scoville units! To facilitate this production, the Lapadats invested in a container refrigeration system that can hold 15,000 pounds of sliced and frozen peppers. They have an automated slicer which slices at a rate of 4000 pounds per hour! Try that with your KitchenAid!

It was such a pleasure to meet with Elaine and Paul this April and learn more about their farm and what it takes to get those beautiful vegetables to market. Please go and check them out in August-October at St. Jacobs Market, St. Jacobs Ontario. You can also reach out to them through their website https://spruceridgefarm.ca/ or give Paul a call at 519-476-1169.

Market Goers Arriving at 6:30 a.m at Spruce Ridge Farm stand at St. Jacobs Market


Beautiful blossoms and delicious fruit and all yours with one Montmorency sour cherry tree

My Montmorency Sour Cherry Tree July 2016

When I first moved to Southern Ontario, I was amazed at all the fresh fruit that was locally grown: apples, pears, peaches, plums, Concord grapes, and my favourite, cherries! The very first cherry pie I ever made was a sour cherry pie, the perfect blend of sweet and sour, and it was love at first bite.  At the time, we lived in a high-rise apartment building, and I vowed that if I ever had room to grow a fruit tree that it would be a sour cherry tree.

In 2006, my husband and I moved our family to a beautiful brand-new home with a south facing backyard just north of London Ontario. That fall, anxious to start our landscaping, we planted the first of our trees. And, in order to get some immediate shade we opted to buy large trees which required having a landscape company use a tree spade to transplant the trees to our yard.  Voila!  Instant shade!  I decided to border the backyard with three beautiful blue spruce trees along the back fence, five Alberta spruce trees on the southwest side and a large maple on the southeast side. The plan was that the next year I would expand the garden by adding  my favourite flowering trees, shrubs and perennials.

So, you guessed it, the next spring the first tree I chose at the nursery was my beloved Montmorency sour cherry tree. Now I have to admit, I had not picked out the exact location for this tree when I bought it.  I knew I would make it work, or at least that is what I told myself proudly as I put my newly purchased “tree baby” in the truck. That year, the cool spring weather turned hot quickly – not the best time to be digging holes or planting a tree.


And so, unsure of where exactly I wanted to plant it, I just dug a hole in one of the garden beds, and, pot and all, stuck it in the ground, and there it grew for one year. Not the best start for the tree, but a testament to just how resilient these trees are.

The next spring, I knew I needed to move it to its forever home to give it optimal room to grow.  I decided to make it a focal point in the yard and so dug it up and moved it to the centre of my backyard. And there it has grown, in perfect view from my dinette table.  One of the best landscaping decisions I ever made!

Sour Cherry Blossoms April 28 2021

In the early spring, around the end of April or beginning of May, this amazing tree bursts with snow white blossoms, which are short lived but often last until Mother’s Day – making for many lovely Mother’s Day pictures over the years.

Mother’s Day 2015

By June the fruit has formed and usually two months after the tree blooms, by the first week of July, the bright red fruit with yellow flesh is ready for picking. This rich, tart, tangy fruit, like when the tree blooms, happens all at once and so be prepared to harvest all those delicious cherries in one to two weeks. Check out this link to learn how to pit sour cherries and make my all time favourite  Sour Cherry Preserves

Sour Cherry Preserves 2019

For the most delicious sour cherry pie use the Busy Life Pie Crust and make a sour cherry filling using this Blueberry, Berry or Cherry Pie  recipe.

Now why does this fruit tree make sense for absolutely anyone interested in growing fruit in their yard? First, although these trees grow optimally in sandy, loamy soil, they also grow well in a variety of soil conditions with good drainage. It is self fertile and so you do not need to plant an orchard in order to get fruit. And the tree is hardy in areas as cool as zone 4a and in fact requires about 700 chill hours or a typical winter like here in Southern Ontario. The best part- it does not need to be sprayed with insecticides or fungicides to keep pests away,

The tree can be kept at a manageable height for home gardeners, making it an ideal tree to harvest.

Picking Sour Cherries 2019

I prune my tree in the late winter, (late March in my area) and net the tree to save the cherries from the birds. To ensure plump fruit, I  make sure to water the tree once a week when the fruit is on the tree especially during really hot stretches without rainfall. You can fertilize the tree but the tree that I have in my backyard has never been fertilized.  I do however, amend the soil in the gardens around the tree and it certainly benefits from this.


When planting a sour cherry tree, you will need to care for it in the first year.  This is to ensure that it gets established and makes it through the winter. Here is a summarized planting guide or you can check out this video:


  1. Plant your tree in the early spring (after the risk of frost) or in the fall.
  2. For a tree that is in a pot with a 12″ diameter, dig a hole about 20 “deep and a diameter of 24″ and backfill with about a foot of triple mix soil. Sour cherry trees like slightly acidic soil so you can also mix in some peat moss with your soil. Make sure to make the hole twice the diameter of the pot. This will make it easy for the roots to grow out and down.
  3. After you backfill, add about a half cup of bone meal and mix it in.
  4. Take the tree out of the pot and pull the roots down from the bottom. You don’t want to leave the roots at the bottom wound up.
  5. Fill the rest of the hole with triple mix and then work in some soil acidifier  around the drip line. Don’t add the acidifier close to the roots.
  6. Water the tree.
  7. Wrap some bark protector around the lower trunk of the tree to protect the tree from rabbits and small critters.
  8. Put a layer of mulch around the planting area but not right up to the trunk of the tree. This mulch will keep the weeds down and help the planting area retain moisture.
  9. Stake the tree. Place the stake on the side of the tree where the prevailing winds arise. Thread some rope through a rubber hose. Tie the tree with just light tension making sure that the rubber hose rests on the bark of the tree.
  10. Make sure to water your tree every week this first summer.
Sour Cherry Blossoms April 2021


Sweet sign of spring a walk through the sugarbush

Grades of Maple Syrup- Golden, Amber, Dark and Very Dark

When you live where fresh maple syrup is produced (like I do), you look forward to the month of March. Roadside stands advertise fresh maple syrup, and the pancake houses are open!

Earlier this month, I had the pleasure of visiting my friend Jim Lumsden and his son Mike at their farm, Lumsden Brothers Maple Syrup ,to see first hand how his family makes this golden Canadian treasure.  Situated on 20 acres of land, his family has been making maple syrup for over 100 years, and, as I saw, they have it down to a science!

The set up of the production actually starts in January with the unravelling of 18,000 feet (3.4 miles) of four seasons tubing, which is made out of 100% resin. Each piece of tubing is numbered and labeled and is attached to a specific tree in the maple sugarbush.  These lines are cleaned out with a solution of 70/30 alcohol to water each year and reused, making this an environmentally friendly operation. This complex maze of tubing, in the case of Lumsden Brothers Maple Syrup farm, includes specific hookups to about 1,100 trees.

Maple tree with two taps at Lumsden Brothers Maple Syrup Farm

A tree can be tapped when its diameter of the tree reaches 10″, and when the diameter is 18″, the tree can support two taps. For the health of any tree over 18″, at most two taps can be installed each year. So, in the case of Jim’s maple farm, he installs 1,435 taps!


To keep the tree nice and healthy, it is important that the taps occur in a different spot on the tree each year. In fact, you would have to wait about 50 years before you can tap into the same spot.

Once the overnight temperature does not go below -4°C and the daytime temperature stays above 5°C, the sap will flow and the process of collecting the sap can start.

Sap Collection

Tubing and sap flowing

Tapped Maple Tree

Pump monitor

The system used to collect the sap is quite nifty. Collection is by vacuum and the pump is set to pull 25 lbs. of sap and is set to operate as long as the tree’s sap is running. The vacuum pump is set to turn off automatically when the air temperature hits 0°C .

The sap is collected and then, using reverse osmosis, 55% of the water is removed. Then the sap enters a wood-fired evaporator which is 3 feet wide and 13 feet long. It evaporates 90 gallons of water per hour!

It takes approximately 3 hours from the time a drop enters one end of the evaporator until it condenses and accumulates enough to be able to draw off a batch of syrup.

The syrup is ready when the temperature reaches 219°F and is stored in 34-gallon stainless steel barrels or 10-litre plastic jugs in the freezer until ready to bottle for sale.

reverse osmosis

Stove

Moving the finished product

maple syrup storage containers

There are four grades of maple syrup: golden, amber, dark and very dark.  You get these shades naturally from the tree because the first sap to come out of the trees produces the lightest colour which is the golden and every week further into the season a darker syrup is produced. So, at the end of the sugaring season you will get the darkest syrup.


Now let’s talk about all the fantastic ways you can use maple syrup! Typically, the golden is used to make candy and confections, the amber is what most people  use for pancakes and waffles and the dark and very dark are fantastic in cooking and baking. Each shade of syrup has its own unique flavour so if you get a chance to sample before purchasing, do so because you might find that for your palate you prefer one shade over another.

To learn how to make “Maple Pecan Scones” check out this video.

And, here are three of my favourite baking recipes that use maple syrup:

Maple Pecan Scones
Maple Pecan
Scones

Maple Blueberry Muffins
Maple Blueberry
Muffins

Oat Scones
Oat Scones

Some winter love keeps your rosemary thriving

Rosemary in winter 2021

Rosemary is such an amazing herb! It’s part of the mint family, great in sweet and savoury baking, awesome as a part of a rub for beef or chicken, and beautiful in a cocktail or steeped for tea. And it’s healthy for you too! Rosemary contains carnosic acid, a potent antioxidant that is believed to be beneficial for your brain – improving brain health and memory.

Rosemary

In my early gardening years, I would always buy the largest rosemary plant available at the nurseries every spring, grow and harvest for one summer and then discard it. The sad thing is that rosemary doesn’t grow too quickly, and it sure did seem a shame to be tossing it at the end of the season.

If you live in growing zone 8 or above you do not have to concern yourself with overwintering because rosemary can be left out all season in that growing zone, but, for me in zone 6a with my beautiful Canadian winter, keeping rosemary alive outside was not possible. Trust me I tried!


So instead, we have discovered a nifty way to keep that rosemary alive in the winter by moving it either into our garage or into the house for the winter. We have found that we get the best results, though, when we first shock it into dormancy.

Rosemary grown for 2 years
Nursery garden rosemary after one year

In the part of southern Ontario in which I live, we do not have early or harsh winters, which serves us well for keeping this plant. It is very tolerant of cool weather and harsh conditions. We don’t really think about moving our plant inside until it consistently stays below zero, which for our area usually happens sometime in November.

So, every year, we keep the rosemary outside and let it get a frost. Then, we move it to our garage. If the weather turns and gets warm again, we move the rosemary out for some sun. When it gets cold, we move it back in the garage. This pampering can sometimes keep us busy for about a month.

In late December, we get winter and that is when we will leave it in our garage. This year, we left one of our rosemary plants in the garage until the first week of February. We moved it inside when the temperature was going to dip below -20° C. That plant has been in the house for 10 days now, and it is starting to bloom beautiful purple flowers.


In March, when we start to get sunny days above zero, we will take our rosemary plants out for some sun – just an hour or two a day. Once the days are consistently above zero, we will keep the plants out longer, until the beginning of April when we move them outside for the spring and keep them out until the following November.

Rosemary can live a long time this way, decades in fact, and we have rosemary trees that are five years old. Usually after that they get too large to keep moving them around. So, in anticipation of the end of this shrub, we start another plant from a cutting or just purchase a new one from the nursery.

Rosemary is very drought tolerant and it actually takes in moisture from the air through its needles and keeps itself hydrated in the humid summer months. You really do not need to water your rosemary plant too often. In fact, overwatering will stress the plant and potentially kill it, if its “feet” (roots) are too wet. However, you also do not want to completely dry out the soil.


When we have the rosemary plants in the garage from December through to the end of January, we do not water them. Because the plant is not respiring and the soil was damp when we moved them into the garage, the soil does not dry out.  If we take them outside for some sun when the temperature has risen above zero, we water them then.

So, this year when you are planning your garden, pick up a large rosemary plant, grow over the summer, and follow our lead, keeping your plant alive throughout the winter. When spring arrives, like children, you will be happy to see your rosemary outside basking in the sunshine and enjoying your garden!

If you want to see just how healthy my rosemary stays in the winter, check out this video:


Here are some great recipes using fresh rosemary at Cansanity :

Rosemary Smashed Potatoes
Rosemary Smashed
Potatoes

Barbecue Sirloin Roast
Barbecue Sirloin
Roast

Mustard & Rosemary Grilled Chicken
Mustard & Rosemary
Grilled Chicken

Cranberry Meringue Pie
Cranberry Rosemary
Meringue Pie

Rosemary Focaccia
Rosemary Focaccia

Easy Squash Ravioli With Rosemary Oil
Easy Squash Ravioli
With Rosemary Oil

Lemon-Rosemary Roast Chicken
Lemon-Rosemary
Roast Chicken

Potato Pizza With Fresh Mozzarella and Rosemary
Potato Pizza With
Fresh Mozzarella
and Rosemary

Rosemary Grapefruit Vodka Cocktail
Rosemary &
Grapefruit Vodka
Cocktail

Rosemary blooming in winter 2021

Rosemary kept indoors winter 2021 in bloom


My KitchenAid stand mixer story and which is the right one for you?

KitchenAid Stand Mixers
My KitchenAid Stand Mixers

Shopping for a stand mixer these days can be overwhelming. There are so many models to choose from with different bowl shapes and capacities, motor sizes and fancy names. I hadn’t realized just how many options there were until a friend asked me at Christmas which stand mixer I would recommend. I did a bit of research on the topic, and then it got me thinking I should write a blog and make a video about KitchenAid stand mixers  and the differences between the tilt and the lift models. So here it is.

I have only ever owned KitchenAid stand mixers, and so I will focus the blog on  this particular brand.

Let me start by telling you about when I upgraded from my hand blender to a stand mixer. I was in my thirties, my daughters were young, and we were in those prime birthday party years.


Prior to this time in my life, I hadn’t really made too many cakes; I just wasn’t a fan of icing. However, my eldest daughter was diagnosed with allergies to nuts and peanuts, and because nut-free cakes were not readily available for purchase, my cake making journey began.

I thought the best way to learn how to decorate cakes was to take some courses. I took all the cake decorating courses that were offered by Wilton, and, in the end, learnt how to use fondant, colour flow, and meringue powder. I finished the course knowing how to decorate a three-tiered wedding cake.


Sometime in the midst of all this flour, shortening, butter and icing, my mom came to visit from out of town. She saw first hand all the hand mixing I was doing and thought it was madness. She asked me to put on my coat and took me to The Bay. She didn’t tell me until I got there that she was going to change my baking life forever; she was going to buy me a KitchenAid stand mixer.

I remember telling her, “No really it is fine, I can manage with my hand blender”. But kitchen gadgets were my mom’s thing, and when she decided to buy something, that was it, there was no changing her mind. I remember carrying that big beautiful box of icing salvation on my shoulder – tall and proud.

Heavy Duty KitchenAid Stand Mixer

I have had that mixer, called “Heavy Duty” ever since.

This “Heavy Duty” mixer, nicknamed  “Ice Baby”, has a 325-watt motor, a five-quart bowl capacity and functions with a lift mechanism. She has performed well for me for 20 plus years!


The options were limited back then – the appliance was only offered in white and I believe was only available with the lift mechanism. Now there are two types, lift or tilt and a range of bowl and motor capacities. Just to make this easy to compare, I have put the options in these tables.

ModelBowl Capacity
(Litre/Quart)
Bowl
Options
Motor
Wattage
Colour
Options
Artisan Mini3.5metal250white, black, red
Classic4.5metal250white, black, red
Ultra Power Plus4.5metal300white, black, red, ice blue
Artisan4.7-5metal32528+ colours
Architect5glass or metal325metallic in chrome & empire red
ModelBowl Capacity
(Litre/Quart)
Bowl
Options
Motor
Wattage

Colour
Professional Plus5metal450black & graphite, red, ice blue, milkshake pink
Pro Heavy Duty
(HD) Series
5metal475red, black and silver
Professional 600
Series
6metal575white, red, pewter, black, silver, milkshake pink, ice blue
Professional 65006metal1000
(1.3 HP)
red ,black, silver
Pro Line Series7metal1000
(1.3 HP)
red, black, silver, white
Limited Edition Pro Line Series7metal1000
(1.3 HP)
copper, clad
Commercial Series8metal1000
(1.3 HP)
pewter, red, black, white

So, for the average home baker, how can this information be useful?

Ultra Power KitchenAid Stand Mixer

In a nutshell, bigger is not necessarily better. About 8 years ago, I bought a second-hand Ultra Power KitchenAid stand mixer which has a four-quart bowl, runs with a 300-watt motor and is a “tilt” model. I jumped at the chance to buy this smaller stand mixer second hand because even though the  “Heavy Duty” lift model has been a reliable appliance, she does have her downfalls.

The shape of the “Heavy Duty” bowl or any “lift” stand mixer is not ideal for whipping up small quantities (for example 1/2 cup) of whipped cream or meringue. My new-used “tilt” mixer, the Ultra Power, has a tapered bowl which is distinctive to all the “tilt” models and so the whip attachment works great for small batch whipping. So, it’s quite fitting that I nicknamed this stand mixer “The Whipper”.


The other great feature of this smaller stand mixer is that she fits well under my counter, and there is quick access to the bowl which allows you to add ingredients while mixing.  To stir, just tilt the beater up and mix with a spatula.  With the larger lift mixers, accessing the bowl requires dropping the bowl and having to work around the beater.

Commercial KitchenAid Stand Mixer

My latest KitchenAid stand mixer acquisition has been the “Commercial”. It has an 8-quart bowl, runs with 1.3 Horse Power (equivalent to 1000 watts) and is a “lift” model. I bought her this year because of all the work I am doing for Cansanity and so have nicknamed her “Cansanity”.


Not only do I use my stand mixer appliances for baking, but I also use them for making pasta, grinding meat, and making pasta sauce from garden fresh tomatoes. To do this, I just attach the pasta maker, the meat grinder or the fruit/vegetable accessory. I wanted a stand mixer that I could run several times a day without worrying about it overheating.  It is important to note that these extra accessories work on all of the KitchenAid stand mixers. You do not have to have the “Commercial” KitchenAid stand mixer.

For those new bakers out there, that are not sure what bowl size is appropriate for you, here are just some examples of what you can process in a 5-quart bowl.

  • 9-10 cups of flour. This is the amount of flour that I use in my “Classic Bread Recipe” which yields 4 loaves of bread. For your reference here is the Classic Bread Recipe
  • 12 egg whites. This is the amount of egg needed for angel food cake. When you whip these egg whites they really increase in volume. For your reference here is the Angel Food Cake Recipe


If you choose to buy a stand mixer with a 4.5-quart bowl size, you will easily be able to make single batch cookie dough, meringue for pie, whipped cream for desserts, and a three-layer cake. For those bakers, that want to make double or triple batches of cookies, then consider getting the 6-7-or 8-quart bowl.

The bottom line is that you should ask yourself how you plan on using your appliance.

  • Will you be making bread dough?

I jump to this question because bread dough is one of the stiffer doughs that you can make using this appliance. It is important to consider the stiffness of the dough because the stiffer the dough the harder the motor needs to work. The stand mixers with wattage under 300 can certainly handle making a bread dough for one loaf of bread, but if you are planning on mixing up enough dough for more than one loaf of bread regularly you should consider buying a mixer with a higher wattage.

  • Are you planning on making bread every day, week or month?


If you run the motor on your stand mixer for long periods of time, it can heat up. So, if you are planning on running your appliance a lot and or many times a day, you should consider getting one of the models that has more power. The higher the wattage, the higher the power.

  • Are you only interested in making cake batters, icing, meringue and whipped cream?

All of the stand mixers, with maybe the exception of the Artisan Mini, will work for these purposes. I would suggest that you consider the tilt models because adding in colour tints and add-ins like chocolate chips or nuts can be scraped down and mixed more easily.

  • Are you considering purchasing one of the accessories so you can use your stand mixer for other things? For example, you can use the fruit/vegetable strainer attachment for making pasta sauce.

I buy bushels of tomatoes to process into pasta sauce, and so using the “Commercial” KitchenAid stand mixer is great for me because I run the appliance for long periods of time. Having said that, I have used the “Ultra Power” when I am only processing 2 batches of 10 pounds of tomatoes, and that works just fine.

The only other differences that you should be aware of are presented in this table.

TypeKey ApplicationHeight/WeightKey Design Element
TiltVery efficient at whipping small batches of whipped cream and meringue because of bowl shape and sizeShorter (My Ultra Power is 14” tall)
The tilt models are lighter
Movement on the top of the mixer can occur especially when mixing stiffer doughs. This is because the tilt design has a lever
LiftDouble and triple batches are easily made because of bowl size. Very efficient at mixing large batches of stiff bread doughTaller (My Heavy Duty is 16 ½” tall)
The lift models are heavier
Sturdier design with the lift mixer and so there is little movement when the machine is running

If you plan on putting your KitchenAid stand mixer on the countertop under your cupboard, measure the clearance. The tilt stand mixers are shorter and lighter. But be aware that when the appliance is running, you might find that there is a bit of movement in the top of the tilt mixer.


I am so happy to be able to share what I have learned about KitchenAid stand mixers. I love all three of my kitchen “babies”. I hope this blog has been helpful; please leave a comment and share your experience!


“Glowing” into the New Year with Uranium Glass

My most radioactive fancy bowl
My most radioactive bowl. Isn’t it pretty!

It shouldn’t surprise you that a lifetime of focusing on all things food has resulted in another passion – collecting unique dishware. While some people decorate with new pictures or interesting art, I like to decorate with dishes! Orange and rusts for the fall, red and white for Christmas, blue and white for winter, pastels and flowers for the spring and in the summer, green…. a lot of green!

Most of these dishes have come from thrift stores, auctions or antique markets, making the collection quite eclectic, colourful and interesting.  Over the years, everyone in my family has developed some form of collecting, and so as a family we find these hobbies interesting and exciting.

Uranium Glass dishes
Uranium glass dishes

I am quite proud of my collection and the best part of collecting is that along with the antique dishes comes a story. I will have to admit that until recently, it did not occur to me that some of these dishes might be radioactive. So, this is our story!

This fall, my youngest daughter, a student of physics and math at McMaster University, was asked to do a paper and presentation on the most radiological effect in her life. She knew I had quite a collection of antique green dishes and suspected that at least some of them might contain some uranium oxide, and because of that, decided to do her paper and presentation on uranium glass.


Her findings were quite fascinating, and so I asked my daughter if she could borrow a Geiger counter from McMaster University.  With a Geiger counter, we could do a YouTube video together and bring this information to you!

( Uranium Glass: How to determine if you have these radioactive dishes in your home)

In this blog, I thought I would just expand on the topic and give you some “food for thought”. First, let’s talk about the glassware itself. Why are some dishes made with uranium oxide in the first place?

Uranium oxide was first used as a colouring agent in yellow and green glass in the 1830s. The amount of uranium oxide in this glassware can vary between 2% and 25% by weight. The uranium oxide used in the glassware was pulled from natural uranium sources, meaning we can infer the exact isotope of uranium inside the glasses! Between the 1800s and 1918, regulations were loose. By 1918, the use of uranium oxide in glassware became more heavily regulated and after 1958 production in Canada and many other countries ceased all together. This wasn’t due to health concerns however! During this time, the government and scientists alike were dedicating all resources to nuclear power, research and development. While production remains stagnant in Canada, the U.S. reintroduced the practice under strict regulations. Considering this, we can estimate that the glassware that gave a higher reading on the detector likely predates World War I.

Geiger counter measuring 550 countsGeiger counter

Fancy bowl with handles 1 lb 13 ozBlack light

There are two ways that you can determine if you have uranium glass in your collection. You can either use a Geiger counter to measure the amount of radioactivity, or to conclusively determine that you have uranium glass, check for bright green fluorescence under UV light (i.e., with a black light). Here are some of the dishes that I have in my collection that performed well under both tests:

Fancy bowl 2 lbs 14 ounces

uranium glass pitcher 1000 counts

uranium glass small fancy bowl

uranium glass 3 lb bowl 1000 counts

The four pieces above, all registered over 1000 counts per minute (cpm) on the Geiger counter and fluoresced bright green under UV light.  The detector counts particles (alpha, beta and gamma) that hit the gas inside.  With these counts, my daughter believes that these four pieces may have 25% pure uranium oxide in them and that they would be quite old.


The three pieces below, have lower amounts of ionizing radiation (between 400 and 900 cpm on the Geiger counter) but still fluoresced bright green:

Fancy bowl with handles 1 lb 13 oz

Divided Plate 1 lb 13 oz

Candy Dish 1 lb 6 oz

The remaining pieces did not fluoresce very brightly, but registered between 300 and 400 cpm on the Geiger counter.  They include six plates and a small bowl, and are pictured below. I did not show them pictured under a black light because they did not light up enough to be visible in the picture.

6 plates 15 oz per plate

small bowl with 350 count (2) blog

So what does that all mean? Are these dishes safe to have in my house?

Measuring radioactivity in uranium glass

Now that we have the weight and counts per dish we made some assumptions. For the dishes with over 1000 cpm, weighing a total of 9.5 pounds, have 25% uranium oxide. And, the remaining pieces with a total weight of 14.5 pounds, dishes with under 1000 cpm, have  2 % uranium oxide.

We will also assume that we are always at a distance of 100 cm away from the glass.

With these assumptions my daughter was able to calculate the annual dose of radiation that we have received:

uranium glass radioactivity calculations


The total dose per year from these dishes is 0.23 mSv/year. This is equivalent to two chest x-rays or six coast-to-coast flights across North America in one year.

This is a pretty small dose. The International Commission on Radiological Protection (ICRP) effective dose limit for the public is 20mSv per year. Anyone exposed to the glass will not experience any ill effects. Under these assumptions, the glass is well within regulations and perfectly safe to have in my house.

I wanted to focus this blog content on the vintage green dishes in my collection, but you should know that uranium oxide can also be found in yellow dishes that are commonly referred to as “Vaseline glass”.


Also, custard glass that has a slight tinted green tint in regular light may also contain uranium oxide. It is important to note that true uranium glass will fluoresce bright green under UV light. So, if you find glassware that fluoresces a bright colour but the colour is not bright green then it is not uranium glass, or if any of your dishes register radioactivity with a Geiger counter but do not fluoresce bright green under UV light, it is not true uranium glass.

The practice of using uranium oxide in glassware does still take place. However, the pieces  are ornamental or novelty pieces, not dinnerware. These modern pieces come in a range of colours, including blue, and fluoresce green under UV light.

Such fun to find out something new about my dish collection, and such an interesting activity to do with my daughter this Christmas! I would love to spend more time researching this topic of uranium glass and all the ways that uranium oxide was and is used in glassware before publishing this blog but that may take some time. So instead, here is the first blog on uranium glassware! I hope I have piqued your interest, and if you find any dishware in your collection that glows, let me know and join me in “Glowing” into the New Year!

Uranium Glass Fluorescing Under UV Light
Uranium glass fluorescing under UV light

“It came with some cookies; it came with some bread. It came with two daughters and board games, we said. Maybe a pandemic Christmas doesn’t have to feel bad, maybe it is just one more Christmas we had.” Cansanity 2020

Pulla Bread
Pulla Bread

“It came with some cookies; it came with some bread. It came with two daughters and board games, we said. Maybe a pandemic Christmas doesn’t have to feel bad, maybe it is just one more Christmas we had. ” Cansanity 2020.

Like most people, we had no idea how our Christmas and holiday season was going to play out. The COVID-19 pandemic most likely meant that as we got closer to Christmas the restrictions, on places we could gather, were going to tighten. I decided early on to lower my expectations for Christmas 2020 and just carry on with the activities that I could safely do.

So, getting ready for the holidays this year was unlike no other. We put up our lights and the Christmas tree, but as the holidays approached, we decided that shopping and gathering with our friends was not something that was necessary this season. Instead, we would have a modified early Christmas, on December 21st, so that we could see our daughters, perhaps before a lockdown in our area.


I busied myself the entire month of December working hard on Cansanity. I concentrated on sharing some of my very best cooking and baking holiday traditions, like making  pierogi,

Pierogi (Perogy)(Pedaha) Dough And Potato Cheddar Cheese Filling

tourtiere,

Tourtiere

Christmas cooking and baking including cookies,

Christmas Cookies

Butterscotch Peanut (Soynut) Butter Squares Peanut Butter Squares

Moose Turds Moose Turds

Santa's Whiskers Santa's Whiskers

Gingerbread CookiesGingerbread Cookies

Easy Sugar Cookies Easy Sugar Cookies

Mama's Easy Shortbread Mama's Easy Shortbread

Candy Cane Biscotti Candy Cane Biscotti

Chocolate Peppermint Shortbread BarsChocolate Peppermint ..

The Ultimate Ginger CookieThe Ultimate Ginger Cookie

Christmas BiscottiChristmas Biscotti

Stained Glass AngelsStained Glass Angels

Mascarpone Sandwich Cookies Mascarpone Sandwich Cookies

and pulla (Finnish coffee bread.)

pulla (Finnish coffee bread)

All activities that I normally do at Christmas time, but usually with the help of my two daughters and my niece.

But I wasn’t sad, because as I meticulously worked through all the steps and the nuances of each recipe, I felt like I was reaching out and connecting with all of you. It was fun to create the videos, and because of them, I never felt alone while cooking and baking this season. Thank you!

I gave most of the cookies and baking away – something I usually do – but this year somehow it felt more meaningful.


My daughters, both university students and both continuing their studies at their homes online, were eager to see us, and so prior to coming home, both took extra precautions to minimize contact with people. I cooked the turkey prior to them coming home, so that the two days that they were with us could be spent together without having to worry about cooking or kitchen cleanup.  This worked out perfectly! In fact, it was so nice not to have to cook when they were here that I am considering making this a new tradition!

It is the 23rd of December and my daughters will go home tomorrow, and my husband and I are going to spend the next two days relaxing, eating leftovers and being thankful that we had one more holiday season. My heart goes out to all of you that have suffered with COVID-19, especially to those who have lost loved ones.

Here is hoping that vaccinations roll out fast, and that life returns to normal in 2021. In the meantime, stay healthy, safe and strong.  I hope that you all found something precious and good out of 2020 and the holiday season. Merry Christmas!


Winter is coming….what’s next?

Winter backyard photo
First light snowfall winter 2017

Well, it has been a busy couple of months! For starters, I have added over 150 recipes to the Cansanity website and taken some incredibly interesting photos of delicious food and fun gardening projects, which will be featured in some upcoming blogs. It has been eleven months since I first published the website and I feel I have only scratched the surface on all the gardening and cooking tips that I want to share with you. This is so exciting for me because I am loving this journey. I want to say I am so thankful to all of you for supporting Cansanity by following the posts on all the social media platforms, including Facebook, Instagram, YouTube and Pinterest. You make my day when you like, comment and share the posts and I hope Cansanity has been a wonderful distraction from the COVID-19 pandemic for you; it sure has been for me!

As November draws to a close, I want to share with you some of the ways I put the garden to bed for the winter.  To begin, we have rabbits that frequent our yard in the winter, and so we have found that putting up a temporary fence around the roses protects the bark.


Rabbits 2011

Rabbits have amazing jaws and will gnaw at these plants – thorns and all.  Even though roses are pretty hardy and have withstood considerable damage in past years, I find that protecting them this way gives me peace of mind that the roses will come back strong and healthy the following year. If you grew roses for the first time this year, you should not prune them until the spring. The rose hips that form on the stems signal the rose to go dormant. They may look scraggly this winter but just leave them. In 2021, I will be doing a series of blogs talking about roses.  So, if that is of interest to you, stay tuned.

I have a raspberry patch near the back fence, and once the last leaves fall from the plants, I like to get in there and prune the canes.  By cutting the canes back by a third, I encourage new growth and more berries the following year.  While I’m in there, I will also find those canes that have died, and I remove them, making the patch tidier and more pleasing to look at.

Garlic Planted Fall 2020

For my garden boxes in which I planted garlic, we rake up the leaves and add them to the top of the box. This does two things.  First, it acts as a blanket to protect the soil from wind and rain erosion, and then secondly, as they start to decay, the leaves add compost to the box.

The garden boxes that we leave empty without any winter plantings are just amended with some well rotted cow manure and compost, and the soil is turned over, leaving the box set for early planting in March the following year. You can leave the amendments to the following spring, but I like to do it in the fall so that as soon as the ground is workable, I can plant.

For the many dozens of planters that housed flowers or vegetables, we remove the soil and add it to our raised vegetable garden. We turn the soil over and leave it for early planting the next spring. The potting soil has vermiculite or perlite and adding it to your garden soil will help with the quality of your soil.  Once emptied, I like to clean the containers and put them away in the garage, as this will prevent the cold weather from causing cracks in the containers. I do, however, leave my 3’ Mayne garden boxes half full of dirt on my deck and have not had any problems with them cracking or getting damaged.


Most of the plants that were in our gardens or pots are composted but there are some exceptions. We never compost kale, Brussels sprouts, cabbage, broccoli, cauliflower or any of the plants from the Brassica family. If you compost these plants, you may be overwintering pests like the cabbage moth which will lead to damage to the leaves of brassicas the following year.  We always, however, remove them from the garden. You may be tempted to leave the kale in the garden because it might come back the following spring. But in doing so, you may be encouraging pests like the cabbage moth, which will overwinter even in extreme winter temperatures.

One other tip to deter pests overwintering in your garden is to create hills in the garden. By doing this, when the temperature drops to the frigid, the cold is more likely to  penetrate through the soil and kill off pests.

Plants I leave in the garden boxes include herbs like parsley, thyme and sage, which will continue to hold onto their leaves even after a couple of light snowfalls and low overnight temperatures. I can usually harvest my parsley well into December.

Carrots after three snowfalls November 2020
Carrots after three snowfalls 2020

Root vegetables like carrots and beets can stay in the soil until you are ready to use them. I usually harvest carrots right up until the ground freezes, but I do have to say that I have left carrots in over the winter and have harvested them the following spring too!


Picked Nov 29 2020

I love growing celery even though it takes a long time to develop in the garden. I usually leave most of my celery in the garden until the snow accumulates. When the snow is here to stay, I harvest the remaining celery and make chicken or vegetable stock that I then pressure can or freeze  for the winter.


Now, like I said, I do take out all the brassicas plants and toss in the garbage but some I leave until the winter sets in because kale and Brussels sprouts can withstand a couple light snowfalls.  So, before you pull out the plants and discard them, get the most out of the plants by using them in your fall recipes. And when the snow looks like it is there to stay, remove the plants.


I have only touched the surface of all the information I plan on sharing with you. I look forward to expanding on this content in future blogs, and I am very excited about new topics to be covered. As we move into December and the holiday season, I will be sharing my favourite Christmas recipes and, for those that are following Cansanity for canning recipes and tips, stay tuned because the “Cansanity” has just begun!

Cansanity 2018
Fall Canning At Cansanity 2018


Come on Mother Nature let’s tango-part two of my tomato planting story.

Tomatoes 2014

Well, this has been a great year to write my tomato planting story!

May weather fluctuated from -5°C overnight one week to a rocking hot temperature of 37°C the following week and then back down to a low of 5°C.  Now that we are into the second week of June, the weather still is unsettled with wild fluctuations from week to week.

This is how Mother Nature and I tango.  You see the tango, much like tomato planting, is not a smooth passionate love story, it is a dance that is intended to remind you that there is drama and suffering in passion.  With the tango there is always a lead and a follower and my lead in this dance is Mother Nature. She is a dominant lead pushing me to my limits, but I am seasoned in this dance with her; I am intuitively in tune to her next move. And even though I can hold myself properly and almost relax into this rhythm, in the tomato tango, I must always be engaged and ready in anticipation of what will come next.


This part of the tomato planting story starts with the anticipation of cooler than normal overnight temperatures. You see tomatoes grow the best when the daytime temperature is at least 22°C (73°F) and the overnight temperature does not go below 13°C (56°F).  It is recommended that you plant your tomatoes when the daytime temperature will be consistently in that range. Tomato plants grow well when their roots are warm.

You can prepare your planting area in advance of these temperatures by amending your soil with some well composted manure and then laying some black plastic over the area. The plastic will hold the heat from the sun and warm the earth below.  You can do this several weeks before you are going to plant your tomatoes.

Once the daytime and nighttime temperatures are in the ideal transplanting range you can go ahead and plant your tomatoes. And this is where we tango. Like I mentioned, Mother Nature is a dominant lead in the tomato tango. Just when you feel you can relax and plant your tomatoes and count on the weather to cooperate, Mother Nature throws in a dip.

And this is how it played out this year. At the end of May, it was hot, the overnight temperatures were good and so I planted. All of my tomato seedlings had at least 3-4 true leaves and my garden tomato seedlings were at least 6 weeks old and were at least 6” tall.  In fact, since some of the tomatoes were started in the first week of April, they were 16” tall!


For each plant, I made sure to dig a hole that would bury the stem. I removed the first leaves and even some of the true leaves for the taller plants because tomato plants will root wherever the stem is buried. For my taller plants I prepared a trench so that I could bury a significant amount of the stem. (Check out this video How to transplant tomato plants into your garden or patio pot. to learn how to trench plant.)

Creating a basin around the newly planted tomato plant

To each planting hole, I added 1/4 cup of bone meal, added the plant and then made a basin around the stem about 12” in diameter. This is to ensure that the water pools in the area before being absorbed by the soil. The two benefits of doing this is that one, you will see how much water you added and two, when watering, the water will not just run off – it will stick around and be taken up by your plant.

Watering newly planted tomato plant 2020

My raised garden is not that large but it is deep and so I plant my tomatoes 24” apart. I mostly plant determinate tomatoes in my garden and so I will prune my tomatoes regularly to make sure there is good air flow between them.

For the indeterminant tomato plants, I add a stake on the opposite side of the prevailing winds, 2-4 inches away from the plant.  I want the plant to move towards the stake when it is moved by the wind.

Each plant is watered deeply and I will do that every day. Tomatoes need consistent watering to grow well. I am pleased, and sigh a bit of relief, my babies are in the ground.

And then Mother Nature and I tango! I notice the weather is going to dip below 9°C for several nights!

Tomato plants with black perforated plastic 2020
Tomato plants with black perforated plastic for warmth

But I am prepared. In my garage I have black perforated plastic, tomato cages, clear plastic and packing tape.  So, before the cool nights, I remove the stakes and lay down the black perforated plastic. This will help trap the heat from the sun ensuring the roots of my plants stay warm.  To further keep the plants warm on the cool nights, I gently push in tomato cages, wrap each one in clear plastic and secure the plastic with packing tape. I leave the top of the tomato cage open so that the plants can get sunlight and good air flow during the day.

Tomato greenhouses made with tomato cages and plastic

In the evening, I place either a cotton towel or a blanket and use elastics in the corners to secure the coverings.

Every morning, I remove the towels and blankets and every evening I put them back on.  I do this until the evening weather is in the range that is favourable for tomatoes, at which time I remove the cages and put the stakes back in the ground. I could just leave the cages for the tomatoes that are small, that might be sufficient support for them until maturity. However, my taller plants are now already 21-27” tall, some already above the top of the tomato cage, and I feel that a stake will provide better support throughout the season for these taller plants.


It may seem like these steps to growing tomatoes take too much time and energy and when you have setbacks you may want to give up and go and do something else with your time. But much like the tango, as you master the steps and observe the eloquence and beauty, it won’t be long before you are a passionate devotee of growing tomatoes.

The tango is about as much fun as you can have dancing with a person and I hope that your tomato tango is worth the effort in growing your tomatoes and becomes the most rewarding garden experience you have this year.

First Harvest of Tomatoes August 2014


Don’t be squashed for time-Start your squash plants indoors and prepare the soil for planting outside.

Zucchini blossoms 2018
Squash blossoms 2018

It is that time of year for me when I have to decide whether I am going to have the time and space for growing squash.  Squash are warm-weather plants requiring daytime air temperature of at least 21°C (70°F) and soil temperature of at least 16°C (60°F).  Mother Nature is taunting us this year with her frigid, unseasonable temperatures, but I am hopeful that she will reward our patience and soon give us good planting weather.  By the end of May or the beginning of June, with no risk of frost in sight, I will be able to plant these warm-weather plants.

Butternut squash 2018-Cansanity
Butternut squash 2018

The seeds can be started, in compostable pots, 2-3 weeks prior to transplanting.  So, I have decided to go ahead and start seeds of five different kinds of squash, indoors this week. For outdoor planting, I can get prepared with the first consideration for my plants being the soil.  It will have to be rich, fertile soil with a lot of compost and be located in a sunny location.  Secondly, I need a lot of space devoted to these plants since they need to be planted on average one metre apart, and the vining varieties of squashes can grow up to 15 metres in length.

Further consideration regarding spacing is that squash plants will cross- pollinate with other plants within the same species. For some, that can occur within a mile of proximity. This does not affect fruit production but, if you want to save the seeds for future planting, only plant one type of squash of each species. (The plants within each species will cross-pollinate resulting in seeds that will not be viable.)


Knowing that squash plants, especially winter squash, can vine up to 15 feet long and take up a lot of space, is it worth planting in a small yard?  Well, I think so.  The plants are beautiful, almost ornamental and it sure is exciting to spot your first zucchini or pumpkin on the vine.  If space is your worry, one way to increase available space is to grow your vines up on a trellis, but for heavy fruit like pumpkin, once formed you will have to support this fruit through to maturity with netting.

We have had great success growing our cucumber vines on a trellis, and so this year, we are going to grow some of our squash vertically.  Stay tuned for pictures!

Here are the squash plants that I have decided to grow in my garden this year.

Dark Green and Gold Rush Zucchini – species Cucurbita pepo- days to maturity: 50

This summer squash is one of my favourite plants to grow.  It prefers to be grown from seed in warm soil, but will do fine from a transplanted seedling that has been grown in a compostable pot.  We grow only two zucchini plants because one zucchini plant grown successfully will produce up to 16 zucchinis in a season. One tip that I can give you is that once the plant fruits, it is important to pick the fruit 4-8” in length regularly, as that will stimulate further fruit production.

Naked Bear Pie Pumpkin-species C.maxima- days to maturity: 105

Roasting pie pumpkin 2017
Roasted pie pumpkin

I am particularly fond of this pie pumpkin because it has hull-less seeds which are ideal for roasting for eating and baking. My job is to roast the flesh of the pumpkins which I puree and freeze for use in the fall and winter months in baking and cooking. I set the seeds aside for my husband to roast, since this is one of his favourite fall snacks and he has perfected the art of roasting the seeds.  His recipe and method for roasting the seeds, as well as many of my pumpkin recipes, will be added to the website in time for use in the fall.  If large pumpkins are what you are after, allow only one pumpkin per vine to grow to maturity.

Tiana Butternut Squash -species C.moschata- days to maturity: 95 

I love using butternut squash in my cooking.  One of my favourite dishes to cook in the fall is my Butternut Squash, Brussels Sprouts and Bacon side dish and my favourite Easy Slow Cooker Butternut Squash and Apple soup.  For this soup, I can prepare the vegetables and freeze them, which makes this soup a snap to put together in the winter.  I have had really good success with growing butternut squash in my garden and look forward to growing it every year.

Baby Blue Hubbard Squash -Species C.maxima- days to maturity: 95

Hubbard squash 2018
Hubbard squash 2018

Intrigued by a dark orange hubbard squash at a farmer’s market one year, I purchased that variety of squash to try in my baking and cooking. The skin of this squash is very firm and I was almost turned off by this squash because it was very difficult to slice into.  However, I will tell you that the flesh of this squash is so delicious that it is worth the trouble.  Also, for people wondering about growing it, it is the best squash to grow for winter storage.  Use a diluted bleach solution to wipe down the squash to kill bacteria and mold and this squash will last up to 5 months stored in a cold dark place!


This year intrigued, I decided to grow the blue-grey hubbard squash. Wish me success!  Because I am growing pumpkin as well in my garden, I will not be able to save and use the seeds from either of these plants.

Acorn Table King Squash-C.pepo- days to maturity: 105

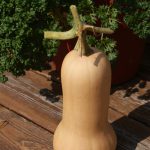
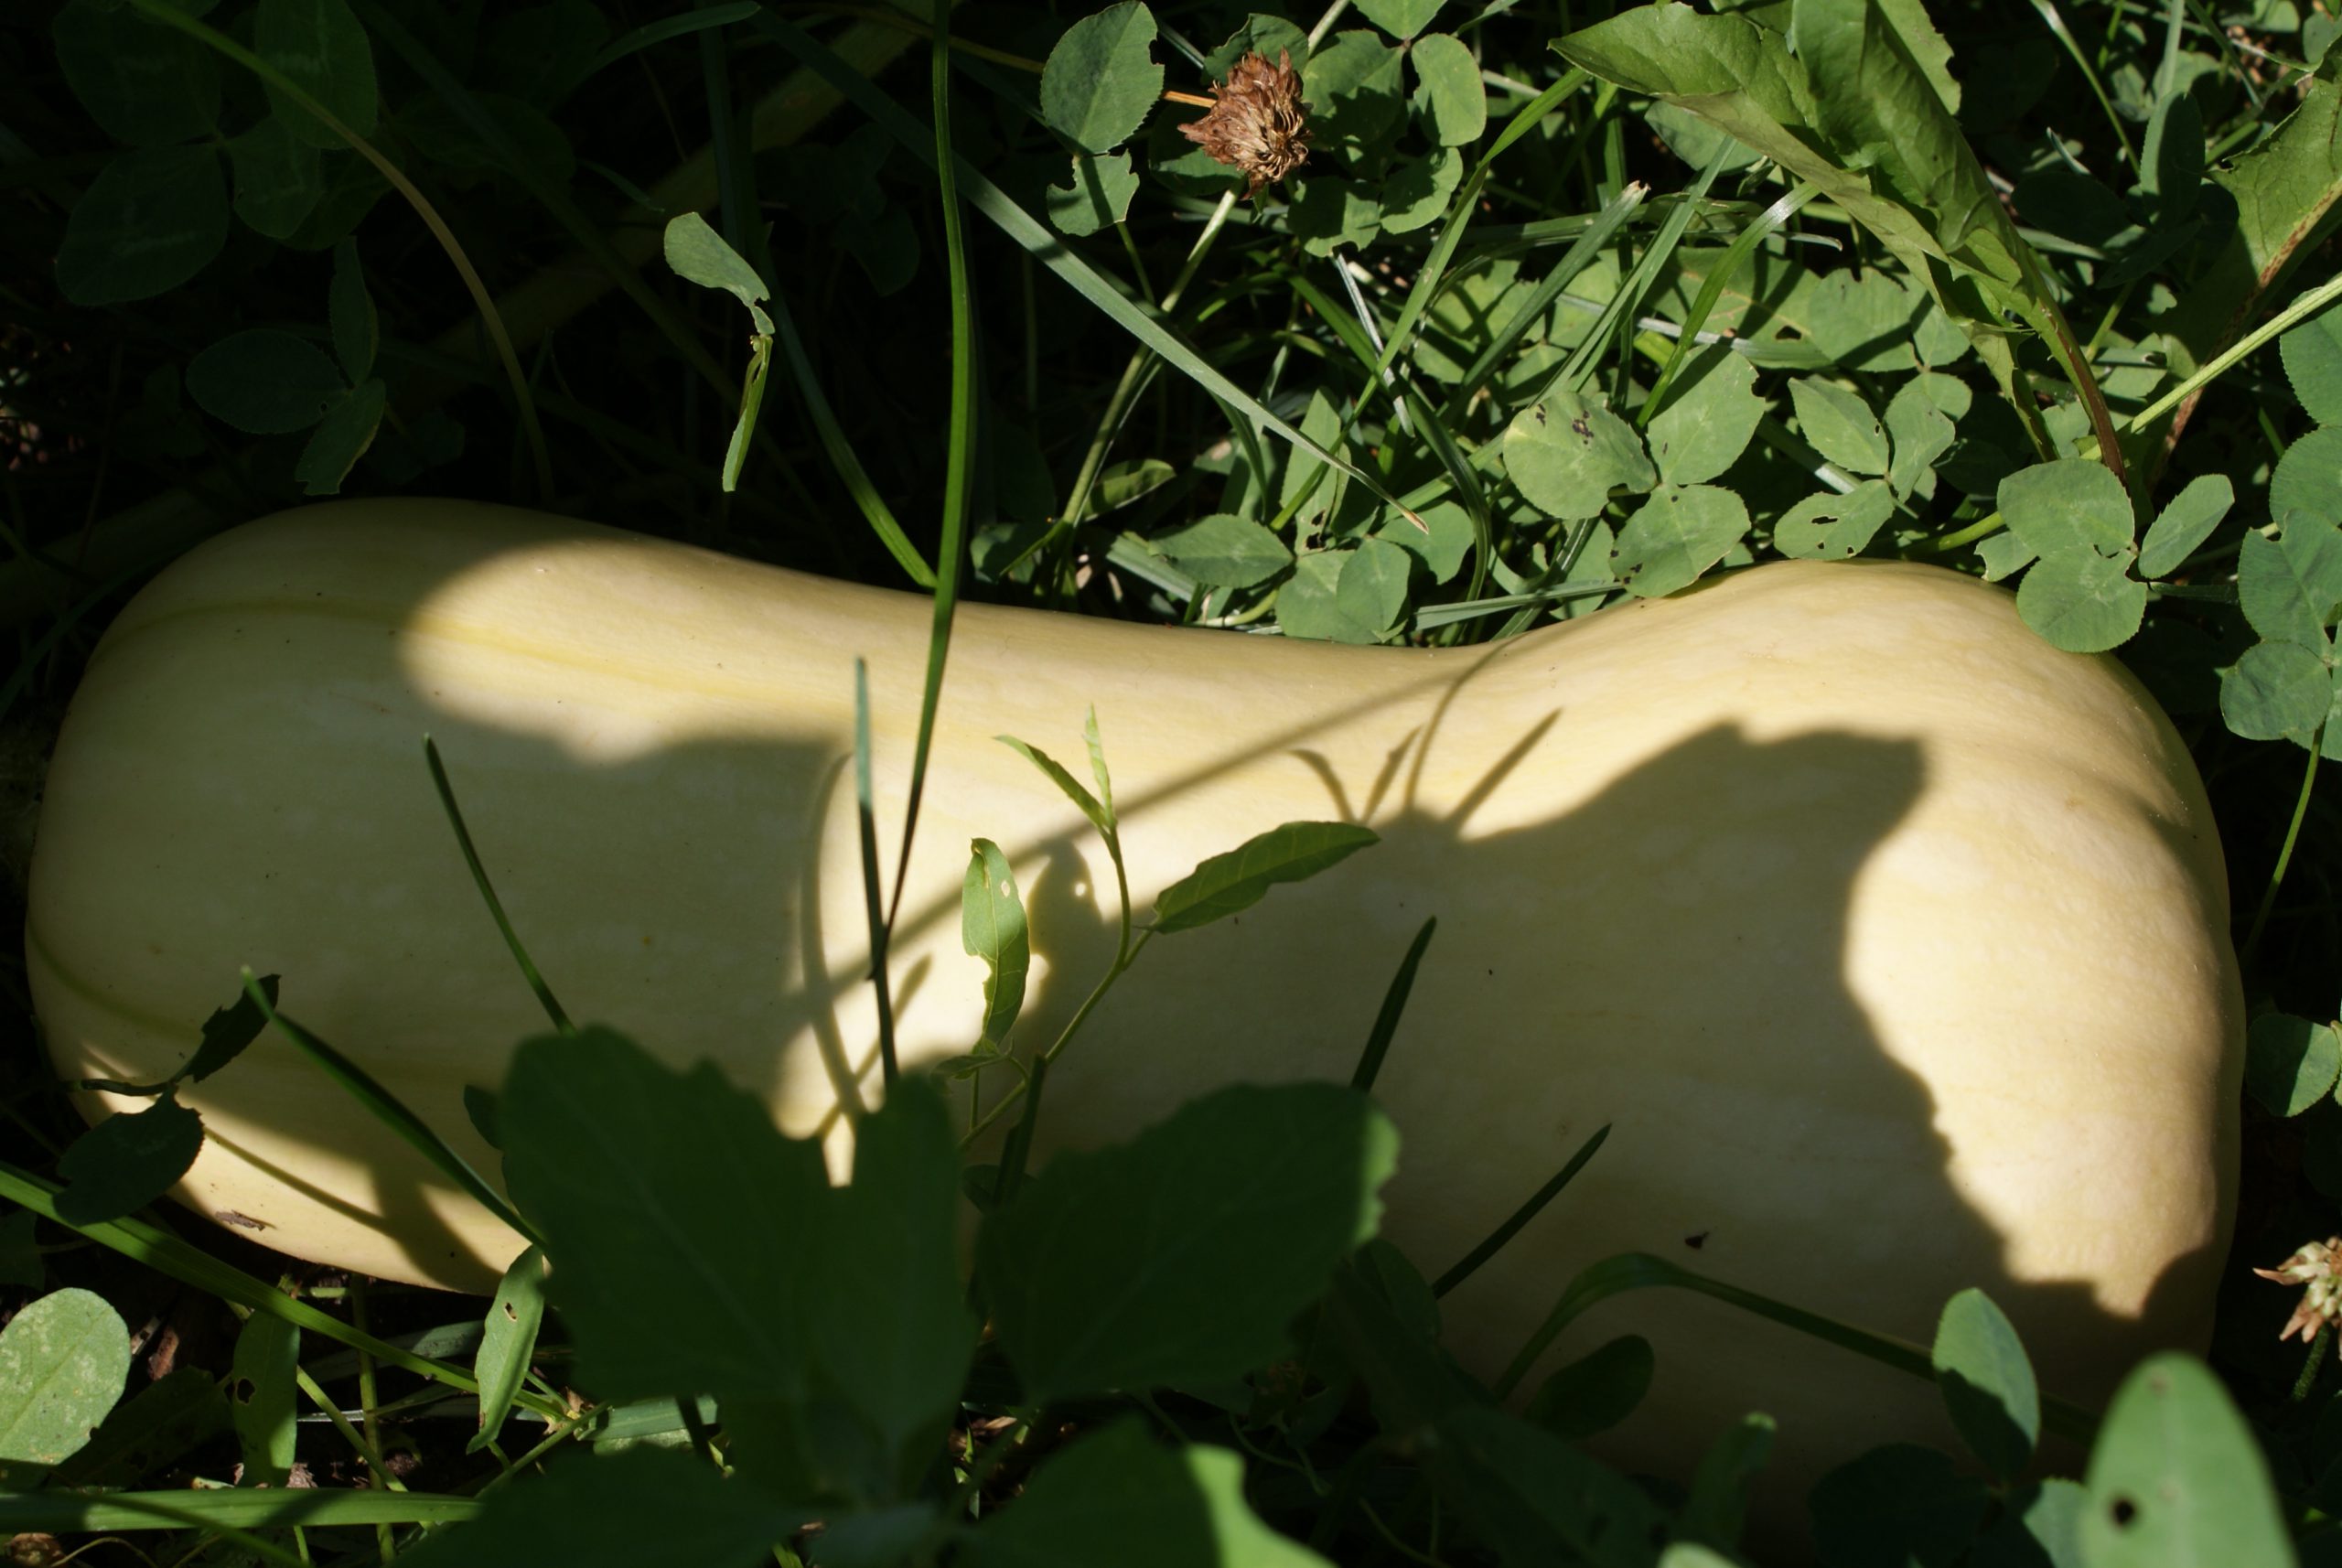
I have grown acorn squash with success in my garden, and I am excited about growing this variety this year.  I chose to grow this squash because it is a better producer than many other squashes.  This compact plant should produce 5-8 small (1 ½ pound) fruits, whereas most squashes only produce 2 – 4 fruits. The flavour for this squash (and many squashes) improves with storage, making it an ideal vegetable to plant for use in the fall and winter months.

Uchiki Red Kuri  Buttercup Squash- C.maxima days to maturity: 80

When choosing the squash varieties that I grow each year in my garden, I like to check out the days to maturity so that I can have squashes available for harvest at different times.  I chose to grow this variety of squash, because it will mature in 80 days.  In my area, we typically have hot weather at least until mid September but sometimes right up until the beginning of October.  If you have a shorter growing season, you might want to choose this squash for your garden.

Review and more detail about how to plant and care for your squash plants.

  1. Plants need rich, fertile soil that has been amended well with compost.
  2. Choose a sunny location that is protected somewhat from the wind, if possible.
  3. Create a little hill that you will grow the plants in. The hill should be at least 12” in diameter and 6-8” high.  The hilled soil will warm quickly in the sun and will improve drainage, both important factors for growing squash.
  4. Plan to plant seeds or transplant seedlings when there is no danger of frost.
  5. Add one cup of organic fertilizer to each hole prepared for planting. I have never added fertilizer after this but you can fertilize with a 5-10-10 fertilizer once a month.
  6. Plant 3-5 seeds or transplant 3-5 seedlings to a hill and then thin to one or two of the strongest vines. Check your seed package for specification of the variety you are planting.
  7. Plan to give a least 1 metre spacing between plants. Refer to your seed package for exact spacing.
  8. Some vines will grow up to 15 feet. So, plan for the vine to take up that much space or plan to prune the vine back after some fruit has formed.  It will produce less fruit but all the energy of the plant will be directed into growing the existing fruit which will result in larger fruit.  Keep in mind that some squash vines will only produce 2-4 fruits in total.
  9. Plan to remove malformed fruit that can occur early in the growing season. The fruit will not be useful and leaving it on the vine will just draw energy away from successful fruit formation.
  10. Once the plant is established, water deeply at the base once a week. Watering at the base will help prevent mildew.
  11. Plan to keep a consistent watering schedule. Extreme fluctuations in moisture can cause disease in your plants.
  12. Summer squash, like zucchini, need to be harvested regularly to stimulate more fruit production.
  13. Winter squash vines may require some pruning during the season to grow larger and better fruit. You can also discourage fruit rot by placing boards under fruit so they are not touching the soil as they mature.
  14. Plant flowers near your squash vines to improve pollination.
  15. Do not plant squash in the same area two years in a row. You want to discourage pests and problems and you do this by rotating your crops.
  16. Do not plant squash plants near potatoes.
  17. Plant squash plants near radishes, lettuce, peas and melons
  18. Nasturtiums and marigolds planted near your squash plants will be beneficial because they will repel pests.
  19. Winter squash will survive a light fall frost but will store better if picked prior to a frost.

Pests and problems:

Powdery mildew – As a preventative, apply bone meal around the base of the plant.

Here is a powdery mildew spray that you can prepare and spray on your plants once a week if needed:

    1. 1 tbsp baking soda
    2. 1 gallon of water
    3. 1 tsp dish soap

Or prepare: 1:9, milk to water in a spray bottle and spray at 7-10 day intervals

Cucumber beetles – These beetles will drain energy from the plant because they eat the leaves and fruit. You can cover your plants with a row cover until the flowers have formed.  We just check our plants regularly and squash the beetles when we see them. Planting nasturtiums before planting your cucumbers is a good companion plant. Nasturtiums  protect themselves by producing an airborne chemical that repels insects and so plants near them benefit from this protection as well.


Squash vine borers – Wasp-like moths lay larvae in the vine stems. You can be proactive and use a section of a pantyhose and cover the stem from about ½ inch below the soil up about 4 inches of the stem.  This will prevent the laying of the eggs.

If you notice sawdust-like particles on the vine, this is the excrement.  You can slice the vine to open to remove the larvae.  If you bury that portion of the vine it will heal and the plant will continue to grow.

Blossom end rot – Will occur when the plant does not have consistent water intake.

Butternut squash 2018