Black Currant Jelly
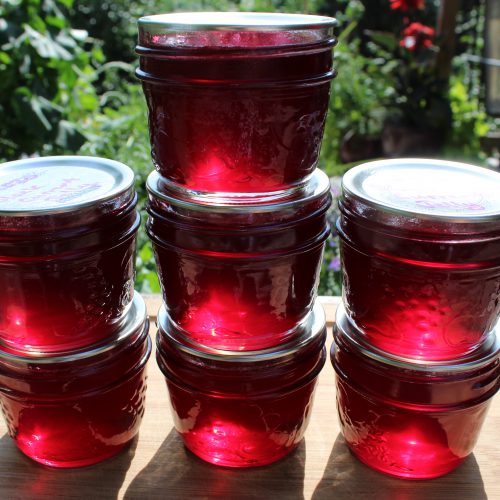
I love making jelly out of my currants! They are so high in pectin that making the jelly is quick and easy. Black currants have a bitter and very distinctive taste when eaten fresh, but the flavour is transformed into a very earthy, almost licorice flavour, when made into jelly. Pure black current jelly is for the true black current lover. If you do not care for the distinctive flavour, add 2 tablespoons of your favourite flavoured liqueur just before canning.
YIELD : 6 125 ml jars
WATER BATH PROCESSING TIME: 10 minutes for altitudes of 1000 feet or below. Adjust processing time for other altitudes.
Equipment
- canning pot
- wire basket or tray for the bottom of the canning pot
- jar lift
- magnetic lid lifter
- cheesecloth
- 6-125 ml sterilized jars with lids and rings
- 8-litre pot with a lid
- fine mesh strainer
- funnel
Ingredients
- 2 pounds black currants, stemmed about 10 cups. Substitute up to ½ pound of red currants
- 3½ cups water
- 3 cups sugar
Instructions
- Combine the black currants and water in the pot and bring to a boil. Reduce to a simmer and cover with the lid. Simmer for 20 minutes.
- Strain the berries through a cheesecloth-lined strainer. Let drip at least 20 minutes. For the clearest jelly do not press down on the fruit or squeeze the cheesecloth.
- Measure out the pectin stock. For every cup of pectin stock you will need one cup of sugar.
- Preheat your oven to 225°F.
- Optional: Spread out your sugar onto a rimmed baking sheet and then warm it in the 225°F oven for 15 minutes. Preheating the sugar will mean that your jelly will reach the gel point quicker in step 7.
- Pour the black currant pectin stock back into your 8 litre pot and bring to a boil. Add the sugar.
- Bring the mixture back up to a boil and continue to cook on high heat until you reach the proper consistency for jelly or what is called the gel point. This should take about 5-8 minutes. You will want to watch this closely as you do not want to boil off too much of the liquid. To determine if your jelly has reached the gel point you can use a candy thermometer clipped to the side of your pan. When the thermometer reaches 220°F your jelly should be ready to can. I like to just use a stainless steel spoon to determine if my jelly is ready. I run the spoon through the hot liquid and then turn the stainless steel spoon on its side. When the jelly forms droplets on the spoon edge, the jelly is done. Check out the video How To Make Red Currant Jelly for a demonstration.
- Skim off any foam.
- Working quickly, ladle the jelly into sterilized jars leaving ¼" headspace. Top each jar with a washed and briefly warmed snap lid. (I put the snap lid in boiling hot water for 30 seconds, this softens the seal.) Add the sterilized ring and tighten to finger tip tightness. Process using the boiling water method in a canning pot for 10 minutes.
- Remove the jars and cool on a board or metal rack. Don't disturb for 24 hours.
- Remove the rings and inspect the jars. If some of the jelly has leaked out onto the jars, wipe them clean with a soapy cloth. Store the jelly without the rings on in a dark cool place for up to a year.
- Store jars that don't seal in the fridge and use immediately.
Notes
Nutrition
Serving: 1tbspCalories: 58kcalCarbohydrates: 15gProtein: 1gFat: 1gSaturated Fat: 1gSodium: 1mgPotassium: 58mgSugar: 12gVitamin A: 42IUVitamin C: 33mgCalcium: 10mgIron: 1mg
Tried this recipe?Let us know how it was!

